Dell Wyse 5070 Thin Client: Ubuntu Server 26.04 LTS, BTRFS and Nextcloud AIO with a Tailscale sidecar
Please feel free to raise any comments or issues on the website’s Github repository.
Pull requests are very much appreciated.

Table of Contents
Overview
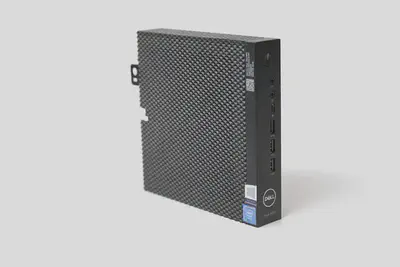
My Dell Wyse 5070 Thin Client is my home server.
Ubuntu Server 26.04 LTS runs Nextcloud All-in-One (AIO) in Docker behind a Tailscale sidecar container, and a Samba share collects the backups of my Raspberry Pi with Home Assistant.
In this guide, Tailscale Funnel publishes Nextcloud on HTTPS port 443, so it is reachable from the internet.
Tailscale Serve without Funnel is the more secure alternative: it keeps Nextcloud reachable only from devices in your tailnet.
The note Serve instead of Funnel in section 9.2 lists what changes.
The AIO interface stays tailnet-only on port 8080.
The host itself is on the tailnet as well, for SSH from anywhere.
Nothing is forwarded on the router, a FRITZ!Box in my case, which could not forward IPv4 anyway because my line is DS-Lite.
The FRITZ!Box reserves a fixed IP address for the Wyse, 192.168.178.55.
This is my hardware:
- Dell Wyse 5070 Thin Client with an Intel Celeron J4105 (4 cores, with AES-NI) and 32 GB RAM.
- Verbatim Vi560 2 TB SATA SSD as the system disk. The built-in 29.1 GiB eMMC stays unused.
- Two USB HDDs for backups: a 6 TB WD Elements and a 4 TB Toshiba.
- Ethernet cable to the FRITZ!Box.
- A Mac for the SSH sessions; any computer with SSH works just as well.
My separate guide Dell Wyse 5070 Thin Client: RAM and SSD upgrade, BIOS update and BIOS settings shows how I upgraded the RAM and the SSD, flashed the latest BIOS and went through the BIOS settings. This guide starts where that one ends.
What is new in Ubuntu 26.04 LTS (Resolute Raccoon) compared with 22.04 and 24.04:
- Kernel: Linux 7.0.
- sudo:
sudois sudo-rs by default;sudoeditworks. - Core tools: most coreutils are the Rust implementation, while
cp,mv,rmanddfremain GNU. The commands in this guide avoid the known gaps, such aschown user:with a trailing colon. - SSH: OpenSSH 10.2, still socket-activated, and
/etc/ssh/sshd_config.d/is still read first. - Initrd: dracut builds it instead of initramfs-tools;
update-initramfsremains as a wrapper. That changes how the encrypted SSD is unlocked over SSH (section 5.7). - Docker: its repository has a
resolutesuite.
I cover two ways of bringing Nextcloud up. Decide before AIO starts for the first time, because a restore has to begin from a fresh, unconfigured AIO mastercontainer:
| Path | Result | Use it for |
|---|---|---|
| A: fresh install (section 9.3) | A new, empty Nextcloud; files can be imported afterwards | A clean start; accounts, shares and settings are created anew |
| B: reinstall from an AIO backup (section 9.4) | The previous instance with its accounts, shares, calendars, file versions and settings | Moving an existing AIO instance to the Wyse (I moved mine from my Mac mini), and rebuilding the Wyse later, e.g. after reinstalling Ubuntu or replacing the SSD |
The deployment and the host configuration live in my scripts repository:
| File | Purpose |
|---|---|
Dell-Wyse-Thin-Client-5070/ | etc/ and usr/ hold the host configuration at its target paths: SSH, the initrd for the encrypted SSD, Docker, BTRBK, Samba, smartd, and the dell-wyse-* systemd units and scripts; sections 5 to 7 copy the files into place. The top level holds the compose file, dell-wyse.env, and the template host.env.example for /etc/dell-wyse |
Dell-Wyse-Thin-Client-5070/dell-wyse.env | Template for ~/scripts/Dell-Wyse-Thin-Client-5070/.env on the Wyse |
Dell-Wyse-Thin-Client-5070/docker-compose.yml | Tailscale sidecar and AIO mastercontainer |
Tailscale/nextcloud-funnel.json | Serve configuration with Funnel, the default; the sidecar mounts the whole shared Tailscale/ folder read-only |
Tailscale/nextcloud-serve.json | The same without Funnel, for a Nextcloud that is reachable only from the tailnet (section 9.2) |
1 The intended layout
| Component | Location / decision |
|---|---|
| System SSD | LUKS2 partition wyse-system with the BTRFS pool inside, unlocked at boot with a passphrase that I type over SSH into the initrd; swap encrypted with a new random key at every boot; EFI and /boot plain (section 3) |
| Ubuntu | @root, mounted at / |
| Administrator files | @home, mounted at /home; includes ~/scripts, with the compose file and .env in Dell-Wyse-Thin-Client-5070/ and the serve configuration in Tailscale/ |
| Docker configuration and named volumes | @docker, mounted at /var/lib/docker: AIO database, Nextcloud installation, mastercontainer configuration, sidecar state |
| Container images and snapshots (Docker 29+) | @containerd, mounted at /var/lib/containerd |
| Nextcloud user data | @nextcloud, mounted at /srv/nextcloud; AIO data directory /srv/nextcloud/data |
| Home Assistant backups from the Pi | @ha-backups, mounted at /srv/ha-backups, shared over SMB to the Pi only |
| Hourly snapshots | @snapshots, reached through the top-level mount /mnt/wyse-top; kept 48 hours hourly and 7 days daily |
HDD 1 (WD Elements, 6 TB), label wyse-btrbk | LUKS2-encrypted BTRFS at /mnt/btrbk, unlocked at boot by a keyfile on the encrypted SSD; daily btrfs send/receive of the snapshots, kept 30 days, 12 weeks and 12 months |
HDD 2 (Toshiba, 4 TB), label wyse-borg | BTRFS at /mnt/backup; AIO’s daily Borg repository in /mnt/backup/borg, encrypted by Borg |
| Off-site | Nightly mirror of the Borg repository and the HA backups on a Hetzner Storage Box over SSH, protected by the Storage Box’s own snapshots (section 7.6) |
| Monitoring | healthchecks.io: the backup jobs, the scrub, SMART, the arrival of HA’s backups and an uptime ping |
| Public access | Funnel https://nextcloud.tailnet-name.ts.net → sidecar → nextcloud-aio-apache:11000 |
| AIO interface | Tailnet only: https://nextcloud.tailnet-name.ts.net:8080 → sidecar → mastercontainer. Break-glass: host loopback 127.0.0.1:8080 through SSH |
| Tailnet nodes | The host dell-wyse (tag:server), for SSH; the sidecar nextcloud (tag:nextcloud), for Nextcloud and the AIO interface |
| Listening on the LAN | SSH from the LAN, SMB from the Pi only |
tailnet-name.ts.net stands for the DNS name of your tailnet throughout this guide (section 8.1).
The seven BTRFS subvolumes share the SSD’s free space; they are not fixed-size partitions.
Keeping the container stores separate makes root snapshots smaller and shows where AIO’s database and configuration live.
Those named volumes matter just as much as /srv/nextcloud/data.
A snapshot of @root alone does not capture sibling subvolumes.
My Nextcloud instance holds about 860 GiB of data, and the Wyse’s SSD has roughly 2 TB raw capacity, so it is a sensible target. This is a single SSD, not redundant storage; the two HDD copies and the off-site mirror from section 7 are what protect it. The separate 29.1 GiB eMMC is not an installation target.
2 Preparations
- Download the Ubuntu Server 26.04 LTS amd64 ISO, verify its signed checksum and write it to a disposable installer USB stick.
- Press F2 at power-on to enter the Wyse’s firmware setup and check these settings: UEFI boot with Secure Boot enabled for Ubuntu, SATA in AHCI mode, and the normal CPU power-saving features. Set AC Recovery to Power On if the Wyse should start again after a power outage; it then waits for the SSH unlock (section 5.7). If you followed my hardware and BIOS guide, all of this is already set; it lists every BIOS setting I use.
- Reboot and press F12 to boot from the USB stick in UEFI mode. With a BIOS admin password and UEFI Boot Path Security set as in my hardware and BIOS guide, the Wyse asks for the admin password first.
Encryption: the system SSD is going to be encrypted (section 3), and so is HDD 1, which holds plain copies of everything on it (section 7.2). A dead, returned or discarded disk exposes nothing, and neither does a stolen Wyse. Every boot waits for the passphrase, which I type over SSH into the initrd from my Mac. HDD 2 and everything that leaves the house are encrypted by Borg and Home Assistant themselves. Nextcloud’s server-side encryption is not used: its keys would sit on the same disks, and in the same backups, as the files.
3 Install Ubuntu on an encrypted system disk
The finished SSD:
| Partition | Size | Content | At boot |
|---|---|---|---|
1 wyse-efi | 1 GiB | EFI system partition, FAT32, /boot/efi | Plain: the signed shim and GRUB |
2 wyse-boot | 2 GiB | ext4, /boot | Plain: kernels and initrds |
3 wyse-swap | 8 GiB | Swap | Encrypted with a new random key at every boot |
4 wyse-system | The rest, about 1.85 TiB | LUKS2, opened as wyse-system, with the BTRFS pool and its seven subvolumes inside | Passphrase, typed over SSH into the initrd or at the console (section 5.7) |
The installer cannot create BTRFS subvolumes, and it cannot be relied on to install into a LUKS container prepared by hand. So this takes four steps:
- Prepare the disk in the installer’s shell, with a deliberately small BTRFS partition.
- Install Ubuntu onto it unencrypted.
- Encrypt that partition in place from the installer USB stick.
- Grow it over the rest of the SSD.
Encrypting 64 GiB in place takes minutes; a pass over the whole 2 TB would take hours. The space added afterwards is encrypted from the start. Nothing old can surface in it, because the first step discards the whole SSD.
The swap partition avoids the additional restrictions of BTRFS swapfiles. Its random key means that nothing in it is readable after power-off. The price is hibernation, which a server does not need.
3.1 Prepare the disk in the installer shell
In the Ubuntu installer, open Help → Enter shell.
ssh-keygen -R <address> and connect again.Inspect first:
lsblk -b -o NAME,SIZE,MODEL,SERIAL,TYPE,FSTYPE,MOUNTPOINTS
# NAME                  SIZE MODEL          SERIAL          TYPE FSTYPE   MOUNTPOINTS
# loop0           1335115776                                loop squashfs /rofs
# loop1            156299264                                loop squashfs
# loop2             27041792                                loop squashfs
# loop3                98304                                loop squashfs
# loop4             70049792                                loop squashfs /snap/core24/1643
# loop5              1581056                                loop squashfs /snap/hwctl/123
# loop6             22769664                                loop squashfs /snap/subiquity/7403
# loop7             52535296                                loop squashfs /snap/snapd/27710
# sda          2048408248320 Verbatim Vi560 493653348990842 disk
# |-sda1          1073741824                                part vfat
# |-sda2          2147483648                                part ext4
# |-sda3          8589934592                                part swap
# `-sda4       2036595687424                                part btrfs
# sdb            62914560000 Twist Line     64847016        disk iso9660
# |-sdb1          2922217472                                part iso9660  /cdrom
# |-sdb2             5271552                                part vfat
# |-sdb3              307200                                part
# `-sdb4         59983790080                                part ext4     /var/crash
#                                                                         /var/log
# mmcblk0        31268536320                0x3c238908      disk btrfs
# mmcblk0boot0       4194304                0x3c238908      disk btrfs
# mmcblk0boot1       4194304                0x3c238908      disk btrfs

ls -l /dev/disk/by-id/ata-*
# lrwxrwxrwx 1 root root  9 Nov 16 08:34 /dev/disk/by-id/ata-Verbatim_Vi560_493653348990842 -> ../../sda
# lrwxrwxrwx 1 root root 10 Nov 16 08:34 /dev/disk/by-id/ata-Verbatim_Vi560_493653348990842-part1 -> ../../sda1
# lrwxrwxrwx 1 root root 10 Nov 16 08:34 /dev/disk/by-id/ata-Verbatim_Vi560_493653348990842-part2 -> ../../sda2
# lrwxrwxrwx 1 root root 10 Nov 16 08:34 /dev/disk/by-id/ata-Verbatim_Vi560_493653348990842-part3 -> ../../sda3
# lrwxrwxrwx 1 root root 10 Nov 16 08:34 /dev/disk/by-id/ata-Verbatim_Vi560_493653348990842-part4 -> ../../sda4

swapon --show # should print nothing
My SSD still had the partitions of an earlier installation; on a new disk, sda has none.
Use the whole /dev/disk/by-id/ata-... path of the verified Vi560, without a partition suffix.
The commands below erase that SSD, so check the lsblk output (model, serial, size) before continuing.
The partition boundaries in the following parted command are cumulative offsets from the start of the disk, in MiB.
Each partition starts where the previous one ends, and the first one starts at 1 MiB to keep the alignment:
| Partition | Size | Start | End |
|---|---|---|---|
1: wyse-efi | 1 GiB = 1024 MiB | 1 MiB | 1 + 1024 = 1025 MiB |
2: wyse-boot | 2 GiB = 2048 MiB | 1025 MiB | 1025 + 2048 = 3073 MiB |
3: wyse-swap | 8 GiB = 8192 MiB | 3073 MiB | 3073 + 8192 = 11265 MiB |
4: wyse-system | 64 GiB = 65536 MiB | 11265 MiB | 11265 + 65536 = 76801 MiB |
So 76801 MiB is the end of the 64 GiB system partition. Section 3.3 later grows it to the end of the disk.
Enter the commands one by one in the same terminal session, because they rely on the DISK and TOP shell variables.
The installer’s shell runs as root, so the commands need no sudo:
# Set the target disk (whole disk, no -partN suffix) and confirm it is the right one
DISK=/dev/disk/by-id/ata-Verbatim_Vi560_493653348990842
lsblk -o NAME,MODEL,SERIAL,SIZE,FSTYPE,MOUNTPOINTS "$DISK"
# NAME   MODEL          SERIAL           SIZE FSTYPE MOUNTPOINTS
# sda    Verbatim Vi560 493653348990842  1.9T
# |-sda1                                   1G vfat
# |-sda2                                   2G ext4
# |-sda3                                   8G swap
# `-sda4                                 1.9T btrfs

# Make sure nothing on the disk is mounted or used as swap
swapoff -a
umount "$DISK"-part* 2>/dev/null

# Discard all blocks and create the partitions
blkdiscard -f "$DISK"
# blkdiscard: Operation forced, data will be lost!

parted -s -a optimal "$DISK" mklabel gpt \
  mkpart wyse-efi fat32 1MiB 1025MiB set 1 esp on \
  mkpart wyse-boot ext4 1025MiB 3073MiB \
  mkpart wyse-swap linux-swap 3073MiB 11265MiB \
  mkpart wyse-system btrfs 11265MiB 76801MiB

partprobe "$DISK" # should print nothing, kernel should re-read the new partition table
udevadm settle # should print nothing, udev should have processed all device events in the kernel queue
lsblk -o NAME,SIZE,PARTLABEL,FSTYPE "$DISK"
# NAME    SIZE PARTLABEL   FSTYPE
# sda     1.9T
# |-sda1    1G wyse-efi
# |-sda2    2G wyse-boot
# |-sda3    8G wyse-swap
# `-sda4   64G wyse-system

# Prepare the EFI partition
mkfs.fat -F 32 -n WYSE_EFI "$DISK"-part1
# mkfs.fat 4.2 (2021-01-31)

# Prepare the boot partition
mkfs.ext4 -F -L wyse-boot "$DISK"-part2
# mke2fs 1.47.2 (1-Jan-2025)
# Discarding device blocks: done
# Creating filesystem with 524288 4k blocks and 131072 inodes
# Filesystem UUID: 3158056c-ac6e-454c-828c-45422492f5fa
# Superblock backups stored on blocks:
# 	32768, 98304, 163840, 229376, 294912
# Allocating group tables: done
# Writing inode tables: done
# Creating journal (16384 blocks): done
# Writing superblocks and filesystem accounting information: done

# Prepare the swap partition
mkswap -L wyse-swap "$DISK"-part3
# Setting up swapspace version 1, size = 8 GiB (8589930496 bytes)
# LABEL=wyse-swap, UUID=40b11619-8ecf-4eec-8a75-49e2d7bed28e

# Prepare the BTRFS partition (note that this is just 64 GiB for now)
mkfs.btrfs -f -L wyse-system "$DISK"-part4
# btrfs-progs v6.17.1
# See https://btrfs.readthedocs.io for more information.
# Performing full device TRIM /dev/disk/by-id/ata-Verbatim_Vi560_493653348990842-part4 (64.00GiB) ...
# Label:              wyse-system
# UUID:               51c948e0-74f2-4f5c-b5e3-90b06f3b421f
# Node size:          16384
# Sector size:        4096	(CPU page size: 4096)
# Filesystem size:    64.00GiB
# Block group profiles:
#   Data:             single            8.00MiB
#   Metadata:         DUP               1.00GiB
#   System:           DUP               8.00MiB
# SSD detected:       yes
# Zoned device:       no
# Features:           extref, skinny-metadata, no-holes, free-space-tree
# Checksum:           crc32c
# Number of devices:  1
# Devices:
#    ID        SIZE  PATH
#     1    64.00GiB  /dev/disk/by-id/ata-Verbatim_Vi560_493653348990842-part4

# Create the BTRFS subvolumes
TOP=$(mktemp -d) # temporary directory, e.g. /tmp/tmp.re3n0I61Ar
mount -o subvolid=5 "$DISK"-part4 "$TOP" # mount the top level of the filesystem
for sub in @root @home @docker @containerd @nextcloud @ha-backups @snapshots; do
  btrfs subvolume create "$TOP/$sub"
done
# Create subvolume '/tmp/tmp.re3n0I61Ar/@root'
# Create subvolume '/tmp/tmp.re3n0I61Ar/@home'
# Create subvolume '/tmp/tmp.re3n0I61Ar/@docker'
# Create subvolume '/tmp/tmp.re3n0I61Ar/@containerd'
# Create subvolume '/tmp/tmp.re3n0I61Ar/@nextcloud'
# Create subvolume '/tmp/tmp.re3n0I61Ar/@ha-backups'
# Create subvolume '/tmp/tmp.re3n0I61Ar/@snapshots'

# Make @root the default subvolume and unmount
btrfs subvolume set-default "$(btrfs inspect-internal rootid "$TOP/@root")" "$TOP"
umount "$TOP"

# Verify: mounting without options must now show /@root
mount "$DISK"-part4 "$TOP"
findmnt -n -o FSROOT --target "$TOP"
# /@root
umount "$TOP"
rmdir "$TOP"
Reboot into the same installer USB stick, so that the installer reloads its storage view:
reboot now
3.2 Install Ubuntu
Click through the installer, choose Ubuntu Server (minimized) and Custom storage layout:
| Vi560 partition | Installer choice |
|---|---|
| 1: FAT32 EFI | Boot device’s EFI partition, /boot/efi |
| 2: ext4 | /boot; this empty partition may be formatted |
| 3: swap | Use as swap |
| 4: existing BTRFS | Leave formatted as btrfs, mount Other → / |
| eMMC, other drives | No formatting, mounts or bootloader action |
With “Leave formatted”, the mount list offers only /home, /srv, Other and “Leave unmounted”.
Choose Other and enter /; if the field already shows a leading slash, leave the rest empty.
The installer then warns that mounting an existing filesystem at / is usually a bad idea.
That is expected here, because the filesystem holds nothing but empty subvolumes.
The installer cannot create subvolumes itself, but it mounts the filesystem’s default subvolume, which the commands above set to @root.
Use the hostname dell-wyse and set up your account and password.
I also opt in to attach the machine to Ubuntu Pro.
Install OpenSSH Server, import your public key if convenient, and skip the featured snaps.
The 26.04 server installer installs the generic kernel (linux-generic, Linux 7.0), which is fine for this machine.
Reboot from the SSD and verify at the local console (or over SSH):
findmnt -no SOURCE,FSTYPE,FSROOT /
# /dev/sda4[/@root] btrfs /@root
findmnt /boot
# TARGET SOURCE    FSTYPE OPTIONS
# /boot  /dev/sda2 ext4   rw,relatime
findmnt /boot/efi
# TARGET    SOURCE    FSTYPE OPTIONS
# /boot/efi /dev/sda1 vfat   rw,relatime,fmask=0022,dmask=0022,codepage=437,iocharset=iso8859-1,shortname=mixed,errors=remount-ro
swapon --show
# NAME      TYPE      SIZE USED PRIO
# /dev/sda3 partition   8G   0B   -1
lsblk -o NAME,SIZE,MODEL,SERIAL,FSTYPE,MOUNTPOINTS
# NAME          SIZE MODEL          SERIAL          FSTYPE   MOUNTPOINTS
# loop0         1.5M                                squashfs /snap/hwctl/123
# loop1        66.8M                                squashfs /snap/core24/1643
# loop2        50.1M                                squashfs /snap/snapd/27710
# loop3        32.5M                                squashfs /snap/snapd/28332
# loop4          74M                                squashfs /snap/core22/3129
# loop5        13.2M                                squashfs /snap/canonical-livepatch/418
# sda           1.9T Verbatim Vi560 493653348990842
# ├─sda1          1G                                vfat     /boot/efi
# ├─sda2          2G                                ext4     /boot
# ├─sda3          8G                                swap     [SWAP]
# └─sda4         64G                                btrfs    /
# mmcblk0      29.1G                0x3c238908      btrfs
# mmcblk0boot0    4M
# mmcblk0boot1    4M
Root must be BTRFS with /@root.
Stop and correct the installation if it is not.
Then install what the encrypted boot needs:
cryptsetupandsystemd-cryptsetupopen LUKS volumes.dracut-networkbrings networking into the initrd for the SSH unlock in section 5.7.
Ubuntu 26.04 builds its initrd with dracut instead of initramfs-tools.
Listing dracut explicitly makes sure of that: it replaces initramfs-tools if an installation still has it.
sudo apt update
sudo apt install --no-install-recommends cryptsetup systemd-cryptsetup dracut dracut-network
dpkg-query -W -f='${Package} ${db:Status-Abbrev}\n' dracut initramfs-tools
# dracut ii
# initramfs-tools un
dracut must show ii.
initramfs-tools must not; it shows as missing or not installed (un).
Then shut down:
sudo poweroff
3.3 Encrypt the system partition in place
Boot the installer USB stick again and open Help → Enter shell on its first screen, or connect over SSH as in section 3.1.
Enter the following commands one by one in the same terminal session, because they rely on the DISK, SYS and MNT shell variables.
They work through these steps:
- Make room. Shrink the BTRFS pool by 1 GiB, which leaves space for the LUKS2 header.
- Encrypt.
Encrypt partition 4 in place.
cryptsetupasks for the new passphrase: generate a long one in your password manager and keep it there. You type it at every boot (section 5.7). - Grow. Extend partition 4 over the rest of the SSD, open the LUKS container and extend the BTRFS pool to fill it.
- Prepare the installed system through a chroot:
/etc/crypttabgets two lines.wyse-systemis partition 4, withdiscard, so that the weekly trim still reaches the SSD. Itsx-initrd.attachtells systemd that the initrd opens it, so that the regular shutdown does not try to close it while/still uses it.wyse-swapformats partition 3 as swap with a new random key at every boot.- The installer’s swap line in
/etc/fstabgives way to/dev/mapper/wyse-swap. The old file stays as/etc/fstab.before-luks. /etc/dracut.conf.d/90-dell-wyse.confgetshostonly="yes". Ubuntu’s default initrd is generic and ignores crypttab; a host-only one carries thewyse-systemline. Section 5.7 replaces the file with the repository’s version.- The initrd is rebuilt, and a check confirms that the
wyse-systemline made it in.
The BTRFS UUID survives the encryption, so the installer’s root entry in /etc/fstab and GRUB’s root= stay valid.
# Set the target disk (whole disk, no -partN suffix) and the system partition
DISK=/dev/disk/by-id/ata-Verbatim_Vi560_493653348990842
SYS="$DISK"-part4

# Check that this is the prepared BTRFS partition and that nothing is mounted or used as swap
lsblk -o NAME,SIZE,PARTLABEL,FSTYPE,LABEL,MOUNTPOINTS "$DISK"
# NAME    SIZE PARTLABEL   FSTYPE LABEL       MOUNTPOINTS
# sda     1.9T
# |-sda1    1G wyse-efi    vfat   WYSE_EFI
# |-sda2    2G wyse-boot   ext4
# |-sda3    8G wyse-swap   swap
# `-sda4   64G wyse-system btrfs  wyse-system
swapoff -a

# Remember the BTRFS UUID; it must survive the encryption
POOL_UUID=$(blkid -o value -s UUID "$SYS")
echo "$POOL_UUID"
# 51c948e0-74f2-4f5c-b5e3-90b06f3b421f

# Make room: mount the top level, shrink the BTRFS pool by 1 GiB and unmount
MNT=$(mktemp -d)
mount -o subvolid=5 "$SYS" "$MNT"
btrfs filesystem resize -1G "$MNT"
# Resize device id 1 (/dev/sda4) from 64.00GiB to 63.00GiB
umount "$MNT"

# Encrypt the partition in place (takes about 6 minutes).
# Enter a new, long passphrase when asked.
# If interrupted with Ctrl-C, continue with: cryptsetup reencrypt --resume-only "$SYS".
# After a crash or power loss, set DISK and SYS again and run cryptsetup repair "$SYS" first.
cryptsetup reencrypt --encrypt --type luks2 --reduce-device-size 32M "$SYS"
# WARNING!
# ========
# This will overwrite data on LUKS2-temp-b06d573e-c4d7-4696-80e5-58d2ce2bf9a3.new irrevocably.
#
# Are you sure? (Type 'yes' in capital letters): YES
# Enter passphrase for LUKS2-temp-b06d573e-c4d7-4696-80e5-58d2ce2bf9a3.new:
# Verify passphrase:
# Finished, time 06m18s,   63 GiB written, speed 172.9 MiB/s

# Change the LUKS label
cryptsetup config --label wyse-system-luks "$SYS"

# Grow partition 4 over the rest of the SSD and let the kernel re-read the partition table
parted -s "$DISK" resizepart 4 100%
partprobe "$DISK"
udevadm settle

# Open the LUKS container, grow it to the new partition size and grow the BTRFS pool to fill it
cryptsetup open "$SYS" wyse-system
cryptsetup resize wyse-system # may ask for the passphrase again
mount -o subvolid=5 /dev/mapper/wyse-system "$MNT"
btrfs filesystem resize max "$MNT"

# Verify: the BTRFS UUID must be unchanged (both lines must be identical)
findmnt -n -o UUID --target "$MNT"
# 51c948e0-74f2-4f5c-b5e3-90b06f3b421f
echo "$POOL_UUID"
# 51c948e0-74f2-4f5c-b5e3-90b06f3b421f
umount "$MNT"

# Mount the installed system (default subvolume @root), /boot and /boot/efi
mount /dev/mapper/wyse-system "$MNT"
ls "$MNT/etc/fstab"
mount "$DISK"-part2 "$MNT/boot"
mount "$DISK"-part1 "$MNT/boot/efi"

# Make the virtual filesystems available inside the chroot
for d in dev proc sys run; do
  mount --rbind "/$d" "$MNT/$d"
  mount --make-rslave "$MNT/$d"
done

# Read the identifiers needed for crypttab and check that neither is empty
LUKS_UUID=$(cryptsetup luksUUID "$SYS")
SWAP_PARTUUID=$(blkid -o value -s PARTUUID "$DISK"-part3)
echo "$LUKS_UUID" "$SWAP_PARTUUID"
# b06d573e-c4d7-4696-80e5-58d2ce2bf9a3 86bab1f0-4492-4e4a-a859-b0bdb6b6286a

# Back up fstab, then replace the installer's swap line with the encrypted swap
cp -a "$MNT/etc/fstab" "$MNT/etc/fstab.before-luks"
grep -v -E '^[^#[:space:]]+[[:space:]]+(none|swap)[[:space:]]+swap[[:space:]]' \
  "$MNT/etc/fstab.before-luks" > "$MNT/etc/fstab"
echo '/dev/mapper/wyse-swap  none  swap  sw  0 0' >> "$MNT/etc/fstab"

# Add the system volume and the random-key swap to crypttab
printf '%s\n' \
  "wyse-system  UUID=$LUKS_UUID  none  luks,discard,x-initrd.attach" \
  "wyse-swap  PARTUUID=$SWAP_PARTUUID  /dev/urandom  swap,cipher=aes-xts-plain64,size=512" \
  >> "$MNT/etc/crypttab"

# Wipe the old swap signature, so nothing finds and activates the old unencrypted swap by its UUID
wipefs -a "$DISK"-part3

# Build a host-only initrd, which carries the wyse-system crypttab line
mkdir -p "$MNT/etc/dracut.conf.d"
echo 'hostonly="yes"' > "$MNT/etc/dracut.conf.d/90-dell-wyse.conf"
chroot "$MNT" update-initramfs -u -k all

# Verify: every installed kernel's initrd must contain the wyse-system line
# wyse-system UUID=... none luks,discard,x-initrd.attach   (one line per kernel; if one is missing, do not reboot)
for v in $(chroot "$MNT" linux-version list); do
  chroot "$MNT" lsinitrd -f etc/crypttab "/boot/initrd.img-$v" | grep '^wyse-system '
done
# wyse-system /dev/disk/by-uuid/b06d573e-c4d7-4696-80e5-58d2ce2bf9a3 none luks,discard,x-initrd.attach
# wyse-system /dev/disk/by-uuid/b06d573e-c4d7-4696-80e5-58d2ce2bf9a3 none luks,discard,x-initrd.attach

# Clean up and close the LUKS container
umount -R "$MNT"
rmdir "$MNT"
cryptsetup close wyse-system
Then remove the USB stick and reboot:
reboot now
3.4 First encrypted boot
Ubuntu now stops at a passphrase prompt for wyse-system on the console; type it there.
Until section 5.7 sets up the SSH unlock, every boot waits for it at the console.
After booting, check the result:
findmnt -no SOURCE,FSTYPE,FSROOT /
# /dev/mapper/wyse-system[/@root] btrfs /@root

lsblk -o NAME,SIZE,TYPE,FSTYPE,MOUNTPOINTS
# NAME             SIZE TYPE  FSTYPE      MOUNTPOINTS
# loop0           13.2M loop  squashfs    /snap/canonical-livepatch/418
# loop1             74M loop  squashfs    /snap/core22/3129
# loop2           66.8M loop  squashfs    /snap/core24/1643
# loop3           50.1M loop  squashfs    /snap/snapd/27710
# loop4            1.5M loop  squashfs    /snap/hwctl/123
# loop5           32.5M loop  squashfs    /snap/snapd/28332
# sda              1.9T disk
# ├─sda1             1G part  vfat        /boot/efi
# ├─sda2             2G part  ext4        /boot
# ├─sda3             8G part
# │ └─wyse-swap      8G crypt swap        [SWAP]
# └─sda4           1.9T part  crypto_LUKS
#   └─wyse-system  1.9T crypt btrfs       /
# mmcblk0         29.1G disk  btrfs
# mmcblk0boot0       4M disk
# mmcblk0boot1       4M disk

sudo cryptsetup status wyse-system
# /dev/mapper/wyse-system is active and is in use.
#   type:    LUKS2
#   cipher:  aes-xts-plain64
#   keysize: 512 [bits]
#   key location: keyring
#   device:  /dev/sda4
#   sector size:  512 [bytes]
#   offset:  32768 [512-byte units] (16777216 [bytes])
#   size:    3977693839 [512-byte units] (2036579245568 [bytes])
#   mode:    read/write
#   flags:   discards

swapon --show
# NAME      TYPE      SIZE USED PRIO
# /dev/dm-1 partition   8G   0B   -1
Expected output:
findmnt:/comes from/dev/mapper/wyse-system, with/@root.lsblk: partition 4 iscrypto_LUKS, withwyse-systemand its BTRFS pool inside, about 1.9T. Partition 3 carrieswyse-swap, about 8G.cryptsetup status: LUKS2, withdiscardsamong its flags.swapon: a/dev/dm-…device, which iswyse-swap.
Optional: back up the SSD’s LUKS header to your password manager. Export the LUKS header on the Wyse:
sudo cryptsetup luksHeaderBackup /dev/disk/by-partlabel/wyse-system \
  --header-backup-file ~/dell-wyse-system-luks-header.img
sudo chown "$USER" ~/dell-wyse-system-luks-header.img
Copy the header backup to your Mac with scp:
scp <user>@dell-wyse:dell-wyse-system-luks-header.img ~/Downloads/
Attach ~/Downloads/dell-wyse-system-luks-header.img to the same entry as the passphrase in your password manager.
If the header on the disk is ever damaged, that file and the passphrase are the only way back in.
Then delete the local copy on the Mac:
rm ~/Downloads/dell-wyse-system-luks-header.img
Finally, delete the file on the Wyse (over SSH or at the console):
rm ~/dell-wyse-system-luks-header.img
4 Mount the other subvolumes before installing Docker
At the local console of the fresh Ubuntu, install the editor and the BTRFS tools, then copy the initial home directory, including hidden files and imported keys.
Enter the commands one by one in the same terminal session, because they rely on the POOL_UUID shell variable.
# Install the editor and BTRFS tools
sudo apt update
sudo apt install --no-install-recommends btrfs-progs -y

# Read the UUID of the BTRFS pool that holds /
POOL_UUID=$(findmnt -n -o UUID /)
echo "$POOL_UUID"
# 51c948e0-74f2-4f5c-b5e3-90b06f3b421f

# Create the mount points and mount the top level of the pool (subvolid=5)
sudo mkdir -p /mnt/wyse-top /var/lib/docker /var/lib/containerd /srv/nextcloud /srv/ha-backups
sudo mount -o subvolid=5 "UUID=$POOL_UUID" /mnt/wyse-top
ls /mnt/wyse-top
# @containerd  @docker  @ha-backups  @home  @nextcloud  @root  @snapshots

# Check that the target directories and the new @home subvolume are empty
ls -A /mnt/wyse-top/@home /var/lib/docker /var/lib/containerd /srv/nextcloud /srv/ha-backups
# /mnt/wyse-top/@home:
# /srv/ha-backups:
# /srv/nextcloud:
# /var/lib/containerd:
# /var/lib/docker:

# Copy the initial home directory, including hidden files and imported keys, into @home
sudo cp -a --reflink=auto /home/. /mnt/wyse-top/@home/
sudo ls -la /mnt/wyse-top/@home
# total 16
# drwxr-xr-x 1 root     root      16 Nov 16 08:53 .
# drwxr-xr-x 1 root     root     118 Nov 16 08:42 ..
# drwxr-x--- 1 wmutschl wmutschl 100 Nov 16 09:46 wmutschl

# Back up fstab and unmount the top level again
sudo cp -a /etc/fstab /etc/fstab.before-nextcloud
sudo umount /mnt/wyse-top

cat /etc/fstab
# # <file system> <mount point>   <type>  <options>       <dump>  <pass>
# # / was on /dev/sda4 during curtin installation
# /dev/disk/by-uuid/51c948e0-74f2-4f5c-b5e3-90b06f3b421f / btrfs defaults 0 1
# # /boot was on /dev/sda2 during curtin installation
# /dev/disk/by-uuid/b6f36e34-7f7a-4443-8c7c-09e168af28e4 /boot ext4 defaults 0 1
# # /boot/efi was on /dev/sda1 during curtin installation
# /dev/disk/by-uuid/1271-8172 /boot/efi vfat defaults 0 1
# /dev/mapper/wyse-swap  none  swap  sw  0 0

# Replace the installer's root entry (the btrfs line for /) with one that selects the @root subvolume
sudo sed -i -E "s|^[^#[:space:]]+[[:space:]]+/[[:space:]]+btrfs[[:space:]].*|UUID=$POOL_UUID  /  btrfs  defaults,noatime,subvol=@root,compress=zstd:3  0 0|" /etc/fstab

# Add the other six entries
sudo tee -a /etc/fstab >/dev/null <<EOF
UUID=$POOL_UUID  /home                btrfs  defaults,noatime,subvol=@home,compress=zstd:3        0 0
UUID=$POOL_UUID  /var/lib/docker      btrfs  defaults,noatime,subvol=@docker,compress=zstd:3      0 0
UUID=$POOL_UUID  /var/lib/containerd  btrfs  defaults,noatime,subvol=@containerd,compress=zstd:3  0 0
UUID=$POOL_UUID  /srv/nextcloud       btrfs  defaults,noatime,subvol=@nextcloud,compress=zstd:3   0 0
UUID=$POOL_UUID  /srv/ha-backups      btrfs  defaults,noatime,subvol=@ha-backups,compress=zstd:3  0 0
UUID=$POOL_UUID  /mnt/wyse-top        btrfs  defaults,noatime,subvolid=5,compress=zstd:3          0 0
EOF

# Show the result
cat /etc/fstab
# # <file system> <mount point>   <type>  <options>       <dump>  <pass>
# UUID=51c948e0-74f2-4f5c-b5e3-90b06f3b421f  /  btrfs  defaults,noatime,subvol=@root,compress=zstd:3  0 0
# /dev/disk/by-uuid/b6f36e34-7f7a-4443-8c7c-09e168af28e4 /boot ext4 defaults 0 1
# /dev/disk/by-uuid/1271-8172 /boot/efi vfat defaults 0 1
# /dev/mapper/wyse-swap  none  swap  sw  0 0
# UUID=51c948e0-74f2-4f5c-b5e3-90b06f3b421f  /home                btrfs  defaults,noatime,subvol=@home,compress=zstd:3        0 0
# UUID=51c948e0-74f2-4f5c-b5e3-90b06f3b421f  /var/lib/docker      btrfs  defaults,noatime,subvol=@docker,compress=zstd:3      0 0
# UUID=51c948e0-74f2-4f5c-b5e3-90b06f3b421f  /var/lib/containerd  btrfs  defaults,noatime,subvol=@containerd,compress=zstd:3  0 0
# UUID=51c948e0-74f2-4f5c-b5e3-90b06f3b421f  /srv/nextcloud       btrfs  defaults,noatime,subvol=@nextcloud,compress=zstd:3   0 0
# UUID=51c948e0-74f2-4f5c-b5e3-90b06f3b421f  /srv/ha-backups      btrfs  defaults,noatime,subvol=@ha-backups,compress=zstd:3  0 0
# UUID=51c948e0-74f2-4f5c-b5e3-90b06f3b421f  /mnt/wyse-top        btrfs  defaults,noatime,subvolid=5,compress=zstd:3          0 0
Check the output of cat /etc/fstab:
- There is exactly one
/line. It hassubvol=@rootand your pool UUID, and the installer’s old root line is gone. - All seven BTRFS lines (
/,/home,/var/lib/docker,/var/lib/containerd,/srv/nextcloud,/srv/ha-backups,/mnt/wyse-top) carry the same UUID, the one printed byecho "$POOL_UUID". It must not be empty, so there is noUUID= /anywhere. - The entries for EFI (
/boot/efi) and/bootare still there, and so is the/dev/mapper/wyse-swapline from section 3.3. - The
/mnt/wyse-topline hassubvolid=5and nosubvol=; every other BTRFS line hassubvol=@.... This line mounts the filesystem’s top level, where BTRBK sees all subvolumes side by side and keeps its snapshots in@snapshots. - There is intentionally no
nofailfor the production data mounts. noatimeavoids a metadata write on every read, which otherwise also makes snapshots diverge for no reason.- If something is wrong, restore the backup with
sudo cp -a /etc/fstab.before-nextcloud /etc/fstab.
Validate and mount before proceeding:
sudo systemctl daemon-reload
sudo findmnt --verify --verbose
# Success, no errors or warnings detected
sudo mount /home
sudo mount /var/lib/docker
sudo mount /var/lib/containerd
sudo mount /srv/nextcloud
sudo mount /srv/ha-backups
sudo mount /mnt/wyse-top
findmnt -t btrfs -o TARGET,FSROOT,OPTIONS
# TARGET                FSROOT       OPTIONS
# /                     /@root       rw,relatime,ssd,discard=async,space_cache=v2,subvolid=256,subvol=/@root
# ├─/home               /@home       rw,noatime,ssd,discard=async,space_cache=v2,subvolid=257,subvol=/@home
# ├─/var/lib/docker     /@docker     rw,noatime,ssd,discard=async,space_cache=v2,subvolid=258,subvol=/@docker
# ├─/var/lib/containerd /@containerd rw,noatime,ssd,discard=async,space_cache=v2,subvolid=259,subvol=/@containerd
# ├─/srv/nextcloud      /@nextcloud  rw,noatime,ssd,discard=async,space_cache=v2,subvolid=260,subvol=/@nextcloud
# ├─/srv/ha-backups     /@ha-backups rw,noatime,ssd,discard=async,space_cache=v2,subvolid=261,subvol=/@ha-backups
# └─/mnt/wyse-top       /            rw,noatime,ssd,discard=async,space_cache=v2,subvolid=5,subvol=/
ls -la /home
# total 0
# drwxr-xr-x 1 root     root      16 Nov 16 08:53 .
# drwxr-xr-x 1 root     root     150 Nov 16 08:48 ..
# drwxr-x--- 1 wmutschl wmutschl 100 Nov 16 09:46 wmutschl
Confirm that every path maps to its intended subvolume and that the administrator’s home kept its owner.
Do not use this fresh-install procedure to mount an empty subvolume over an existing Docker installation.
Reboot once and check again; the reboot also applies the new mount options of /, which still shows relatime above.
sudo reboot now
Optional: remove the hidden copy of /home on @root.
The initial /home copy on @root remains hidden beneath the /home mount, and only the copy on @home is in use.
After the reboot, check that /home really comes from @home and that it matches the hidden original.
This is optional, and the data is tiny, but it frees the hidden copy and avoids confusion later.
# /home must come from the @home subvolume
findmnt -no FSROOT /home
# /@home

# Compare the original (hidden) home on @root with the live home on @home
sudo diff -r /mnt/wyse-top/@root/home/"$USER" /home/"$USER"
# no output means identical; small differences in .bash_history, .cache or .local are expected
# because you have used the shell since the copy; files missing from /home/$USER (e.g. under .ssh) are not
Only if /home shows /@home and nothing important is missing from /home/$USER, it is safe to delete the hidden copy.
This removes everything inside your hidden home directory on @root, but keeps the directory itself, which is not used anymore.
Do not touch /home/$USER itself:
# Delete the contents of the hidden home on @root, not the directory
sudo find /mnt/wyse-top/@root/home/"$USER" -mindepth 1 -delete

# Verify: the hidden directory is empty and your real home is untouched
sudo ls -A /mnt/wyse-top/@root/home/"$USER" # no output
ls -A /home/"$USER"
# .bash_history  .bash_logout  .bashrc  .cache  .profile  .ssh
5 Update and harden the Ubuntu host
5.1 Packages, updates and disk health
Connect to the Wyse via SSH and enter the commands one by one:
# Update the package lists and install all pending updates
sudo apt update
sudo apt full-upgrade -y

# Install the tools used in the rest of this guide
sudo apt install --no-install-recommends -y \
  ca-certificates curl git openssh-server ufw unattended-upgrades \
  apparmor apparmor-utils smartmontools rsync btrfs-progs nano less python3

# Turn on automatic security updates: answer Yes when prompted
sudo dpkg-reconfigure --priority=low unattended-upgrades

# Keep automatic reboots disabled (see the explanation below)
sudo tee /etc/apt/apt.conf.d/52-local-reboot-policy >/dev/null <<'APT'
Unattended-Upgrade::Automatic-Reboot "false";
APT
apt-config dump | grep Automatic-Reboot
# Unattended-Upgrade::Automatic-Reboot "false";

# Check that the automatic update timers are scheduled
systemctl list-timers 'apt-daily*'
# apt-daily.timer and apt-daily-upgrade.timer, each with a NEXT time

# Enable the weekly TRIM for the SSD and check it
sudo systemctl enable --now fstrim.timer
systemctl list-timers fstrim.timer
# fstrim.timer with a NEXT time

# Check that AppArmor is running
systemctl is-active apparmor
# active
sudo aa-status | grep apparmor
# apparmor module is loaded.

# Set the time zone to Europe/Berlin
sudo timedatectl set-timezone Europe/Berlin

# Check the time zone and the clock
timedatectl status
Automatic reboots stay off, because every boot waits for the passphrase over SSH (set up below).
When /var/run/reboot-required appears, reboot soon, at a time when you can unlock the disk.
Unattended upgrades install only Ubuntu’s own security updates; Docker, Tailscale and the Nextcloud AIO containers are updated separately (section 10.6).
Leave AppArmor and the kernel’s security defaults as they are: broad CIS or sysctl hardening templates, disabling IPv6 or remounting Docker’s storage noexec can break this setup.
Next, check the SSD’s health in its SMART report, using its whole-disk path. Resolve any media errors before you trust the disk with your data. A clean report is no guarantee for the future and no substitute for backups; section 7.4 adds continuous SMART monitoring.
# Set the whole-disk path of the Vi560 again (the same as in section 3.1; use the TAB key to complete the path)
DISK=/dev/disk/by-id/ata-Verbatim_Vi560_493653348990842

# Quick health verdict
sudo smartctl -H "$DISK"
# SMART overall-health self-assessment test result: PASSED

# Full report: look at the error log and the attributes
sudo smartctl -a "$DISK"
# no entries in the error log, and no reallocated, pending or uncorrectable sectors
Optional: run a baseline SMART self-test.
sudo smartctl -t short "$DISK"    # wait about 2 minutes
sudo smartctl -l selftest "$DISK"
# === START OF READ SMART DATA SECTION ===
# SMART Self-test log structure revision number 1
# Num  Test_Description    Status                  Remaining  LifeTime(hours)  LBA_of_first_error
# # 1  Short offline       Completed without error       00%     24998         -
5.2 Ubuntu Pro and Livepatch
Ubuntu Pro is free for personal use on up to five machines. Attaching a machine adds two things:
- ESM extends security updates to the universe packages this host uses, such as BTRBK, and unattended-upgrades installs them like the others.
- Livepatch applies fixes for high and critical kernel vulnerabilities to the running kernel, without a reboot. That fits the no-automatic-reboot policy above: reboots for new kernels are still needed, but no longer urgent. On an LTS release, Livepatch is enabled automatically on attach.
If you did not attach the machine during the installation, run:
sudo pro attach
Check the status with pro status, which should list esm-apps, esm-infra and livepatch as enabled.
The Livepatch status should report the running kernel as supported.
pro status
# SERVICE          ENTITLED  STATUS       DESCRIPTION
# anbox-cloud      yes       disabled     Scalable Android in the cloud
# esm-apps         yes       enabled      Expanded Security Maintenance for Applications
# esm-infra        yes       enabled      Expanded Security Maintenance for Infrastructure
# landscape        yes       disabled     Management and administration tool for Ubuntu
# livepatch        yes       enabled      Canonical Livepatch service

sudo canonical-livepatch status --verbose
# last check: 10 minutes ago
# kernel: 7.0.0-43.43-generic
# server check-in: succeeded
# kernel state: ✓ kernel series 7.0 is covered by Livepatch
# patch state: ✓ no livepatches available for kernel 7.0.0-43.43-generic
# tier: updates (Free usage; This machine beta tests new patches.)
# machine id: XYZ
# client version: v11.1.0
# architecture: amd64
# cpu model: Intel(R) Celeron(R) J4105 CPU @ 1.50GHz
# boot time: 12 minutes ago
5.3 The scripts repository
My scripts repository is the source of truth for the deployment and the host configuration of my machines. Clone it:
git clone https://github.com/wmutschl/scripts.git ~/scripts
In scripts/Dell-Wyse-Thin-Client-5070/, the folders etc/ and usr/ mirror the host’s file system: for example, scripts/Dell-Wyse-Thin-Client-5070/etc/smartd.conf belongs at /etc/smartd.conf.
The folder’s top level holds the compose file, its .env template dell-wyse.env, and the template host.env.example for /etc/dell-wyse; the sidecar’s serve configuration lives in scripts/Tailscale/.
The sections that need these files copy them into place with install, which also sets owner and mode.
To change the host configuration later, edit the file in the repository, pull, and run its install line again in ~/scripts/Dell-Wyse-Thin-Client-5070, along with the reload or restart that follows it.
Section 10.2 shows how to compare the host with the repository.
5.4 Simple wired networking
Keep the installer’s DHCP configuration on the onboard network interface.
In the FRITZ!Box, check that 192.168.178.55 is free and reserve it for the Wyse’s MAC address.
Confirm the actual interface name, address, gateway and DNS:
ip -br link
ip -br addr
ip route
sudo netplan get
getent hosts mutschler.dev # simple DNS check
curl -I https://mutschler.dev # simple connectivity check
If network changes are needed, edit the existing Netplan definition at the physical console, save a copy first, validate with sudo netplan generate and apply with sudo netplan try --timeout 120.
Do not configure several Ethernet adapters with competing default routes, and keep IPv6 enabled.
5.5 Key-only SSH, verified before password login is disabled
At the Ubuntu console, print the fingerprint of the host key:
ssh-keygen -lf /etc/ssh/ssh_host_ed25519_key.pub
On the Mac, compare it with the fingerprint that ssh shows at the first connection.
If you have connected before, for example in section 3.2, compare it with the stored key instead: ssh-keygen -lF 192.168.178.55.
If the public key was not imported during the installation, install it with the initial account password as follows; adjust the login, the key file names and the IP address:
cat ~/.ssh/id_ed25519.pub | ssh wmutschl@192.168.178.55 \
  'umask 077; mkdir -p ~/.ssh; cat >> ~/.ssh/authorized_keys'
ssh -o IdentitiesOnly=yes -o PreferredAuthentications=publickey \
  -i ~/.ssh/id_ed25519 wmutschl@192.168.178.55
Keep that working session open.
On Ubuntu, install the early configuration drop-in /etc/ssh/sshd_config.d/00-local-hardening.conf from the repository and check the effective result.
It disables root and password login, X11 and agent forwarding, and allows only local TCP forwarding:
cd ~/scripts/Dell-Wyse-Thin-Client-5070
sudo install -D -m 0644 etc/ssh/sshd_config.d/00-local-hardening.conf /etc/ssh/sshd_config.d/00-local-hardening.conf
sudo sshd -t && sudo systemctl reload ssh
sudo sshd -T | grep -E '^(permitrootlogin|pubkeyauthentication|passwordauthentication|kbdinteractiveauthentication|x11forwarding|allowagentforwarding|allowtcpforwarding) '
# permitrootlogin no
# pubkeyauthentication yes
# passwordauthentication no
# kbdinteractiveauthentication no
# x11forwarding no
# allowtcpforwarding local
# allowagentforwarding no
Local TCP forwarding remains enabled for the break-glass tunnel to the Nextcloud AIO interface.
Keep the console password for local recovery and sudo; SSH no longer accepts it.
See Ubuntu’s OpenSSH server guide for more details.
5.6 Firewall and service exposure
From the local console, allow SSH only from your trusted LAN, then enable UFW.
Substitute the observed name of the onboard interface if it is not enp1s0:
sudo ufw default deny incoming
sudo ufw default allow outgoing
sudo ufw allow in on enp1s0 from 192.168.178.0/24 to any port 22 proto tcp
sudo ufw enable
sudo ufw status verbose
# Status: active
# Logging: on (low)
# Default: deny (incoming), allow (outgoing), disabled (routed)
# New profiles: skip
# To                         Action      From
# --                         ------      ----
# 22/tcp on enp1s0           ALLOW IN    192.168.178.0/24

# List every port the machine is listening on, together with the program that owns it
sudo ss -lntup
# Netid        State         Recv-Q        Send-Q                                    Local Address:Port                Peer Address:Port        Process
# udp          UNCONN        0             0                                            127.0.0.54:53                       0.0.0.0:*            users:(("systemd-resolve",pid=1349,fd=18))
# udp          UNCONN        0             0                                         127.0.0.53%lo:53                       0.0.0.0:*            users:(("systemd-resolve",pid=1349,fd=16))
# udp          UNCONN        0             0                                 192.168.178.55%enp1s0:68                       0.0.0.0:*            users:(("systemd-network",pid=1784,fd=37))
# udp          UNCONN        0             0                                             127.0.0.1:323                      0.0.0.0:*            users:(("chronyd",pid=1946,fd=4))
# udp          UNCONN        0             0                                                 [::1]:323                         [::]:*            users:(("chronyd",pid=1946,fd=5))
# udp          UNCONN        0             0                    [fe80::2e0:4cff:fe00:55]%enp1s0:546                         [::]:*            users:(("systemd-network",pid=1784,fd=36))
# tcp          LISTEN        0             4096                                            0.0.0.0:22                       0.0.0.0:*            users:(("sshd",pid=7164,fd=3),("systemd",pid=1,fd=194))
# tcp          LISTEN        0             4096                                      127.0.0.53%lo:53                       0.0.0.0:*            users:(("systemd-resolve",pid=1349,fd=17))
# tcp          LISTEN        0             4096                                         127.0.0.54:53                       0.0.0.0:*            users:(("systemd-resolve",pid=1349,fd=19))
# tcp          LISTEN        0             4096                                               [::]:22                          [::]:*            users:(("sshd",pid=7164,fd=4),("systemd",pid=1,fd=195))
Then confirm from the Mac that a new SSH connection still gets through.
In the ss output, sshd on port 22 is the only service listening beyond loopback; the UDP sockets on ports 68 and 546 belong to the DHCP clients for IPv4 and IPv6.
Section 7.5 adds the only other rule, SMB from my Raspberry Pi.
UFW only has to cover the LAN: Funnel provides the public HTTPS endpoint, so nothing is forwarded on the router. However, two kinds of traffic bypass UFW entirely:
- Docker diverts traffic for published container ports before UFW sees it, which is why the deployment publishes nothing on the LAN (section 9.2). See Docker’s firewall behavior for more details.
- Tailnet traffic is governed by the tailnet policy instead (section 8.1).
Traffic for Nextcloud arrives through the sidecar container, and traffic for the host itself is accepted by Tailscale on
tailscale0before UFW sees it.
nextcloud-aio network from the compose file binds it to 127.0.0.1 instead (com.docker.network.bridge.host_binding_ipv4), so Talk is exposed neither to the LAN nor to the tailnet.
The flip side: clients cannot reach Talk’s built-in TURN server either, so Talk would need an external one.
I don’t use Talk.Finally, check which services run on the host:
systemctl --type=service --state=running
# UNIT                                                  LOAD   ACTIVE SUB     DESCRIPTION
#
# chrony.service                                        loaded active running chrony, an NTP client/server
# dbus.service                                          loaded active running D-Bus System Message Bus
# getty@tty1.service                                    loaded active running Getty on tty1
# multipathd.service                                    loaded active running Device-Mapper Multipath Device Controller
# networkd-dispatcher.service                           loaded active running Dispatcher daemon for systemd-networkd
# polkit.service                                        loaded active running Authorization Manager
# smartmontools.service                                 loaded active running Self Monitoring and Reporting Technology (SMART) Daemon
# snap.canonical-livepatch.canonical-livepatchd.service loaded active running Service for snap application canonical-livepatch.canonical-livepatchd
# snapd.service                                         loaded active running Snap Daemon
# ssh.service                                           loaded active running OpenBSD Secure Shell server
# systemd-journald.service                              loaded active running Journal Service
# systemd-logind.service                                loaded active running User Login Management
# systemd-networkd.service                              loaded active running Network Management
# systemd-resolved.service                              loaded active running Network Name Resolution
# systemd-udevd.service                                 loaded active running Rule-based Manager for Device Events and Files
# thermald.service                                      loaded active running Thermal Daemon Service
# unattended-upgrades.service                           loaded active running Unattended Upgrades Shutdown
# user@1000.service                                     loaded active running User Manager for UID 1000
#
# Legend: LOAD   → Reflects whether the unit definition was properly loaded.
#       ACTIVE → The high-level unit activation state, i.e. generalization of SUB.
#       SUB    → The low-level unit activation state, values depend on unit type.
#
# 18 loaded units listed.
This installation needs no graphical login, printing, FTP, database or web server on the host; Nextcloud AIO brings its own database and web server in containers. If one of them shows up, remove its package by name, and keep the networking, time synchronization and security services. Avoid desktop clean-up recipes that purge packages by wildcard: they can remove essential packages along the way.
5.7 Unlocking the system disk over SSH
At every boot, systemd-cryptsetup reads the wyse-system line in /etc/crypttab from section 3.3, asks for the passphrase and waits.
You answer over SSH into the initrd from the Mac, or at the console.
This is the 26.04 counterpart to dropbear-initramfs.
That package is still in the archive, but it needs initramfs-tools, which 26.04 replaced with dracut as the default and which Ubuntu intends to phase out.
Ubuntu packages no SSH module for dracut yet, so this guide uses dracut-sshd instead: it runs the system’s own OpenSSH in the initrd and answers systemd’s own passphrase prompt, and its author tests it on 26.04.
What this protects, and what it costs:
- Whenever the Wyse is off, the SSD is closed: dead, sent back under warranty, or stolen, on its own or together with the Wyse.
/bootis not encrypted. Someone with physical access could alter the initrd and capture the passphrase at the next unlock, as with any dropbear setup.- Every boot waits for you, including the one after a power cut.
Nextcloud and the backup jobs stay down until you unlock, and
dell-wyse-alivealerts within about six minutes (section 7.1). - The initrd answers on the LAN only, because Tailscale on the host starts only after the unlock. Away from home, connect to a machine on the LAN and unlock from there. For me, that is my Mac mini over Tailscale, or my Raspberry Pi with Home Assistant OS. After a power cut, this works only if that machine starts by itself and rejoins the tailnet. A Mac with FileVault, for example, first waits for its own password at boot, just like the Wyse.
SSH in the initrd. dracut-sshd is not packaged for Ubuntu, so clone its repository into your home directory and check out the release tag 0.7.1.
Read 46sshd/module-setup.sh before copying the module, because dracut runs it as root on every initrd build:
git clone https://github.com/gsauthof/dracut-sshd.git ~/dracut-sshd
cd ~/dracut-sshd
git checkout 0.7.1
git rev-parse HEAD
# 777c87cf7b34d24df55a66b4d5beed1300d63a1b
cat 46sshd/module-setup.sh
sudo cp -R 46sshd /usr/lib/dracut/modules.d/
Then configure SSH for the initrd and rebuild it:
# Give the initrd your SSH public keys; dracut-sshd installs this copy as root's authorized_keys
sudo install -D -m 0600 ~/.ssh/authorized_keys /etc/dracut-sshd/authorized_keys

# Create a passphrase-less host key for the initrd, so the system's own host keys stay off the unencrypted /boot
sudo ssh-keygen -q -t ed25519 -N '' -C dell-wyse-initrd -f /etc/ssh/dracut_ssh_host_ed25519_key

# Allow key logins as root: '*' never matches a password, but unlike the locked default it lets keys through
sudo usermod -p '*' root

# Install the repository's dracut configuration: host-only image, plus networking and bash
cd ~/scripts/Dell-Wyse-Thin-Client-5070
sudo install -D -m 0644 etc/dracut.conf.d/90-dell-wyse.conf /etc/dracut.conf.d/90-dell-wyse.conf

# Rebuild the initrd of every installed kernel (update-initramfs runs dracut on 26.04)
sudo update-initramfs -u -k all

# Check the running kernel's initrd: it must list sshd, authorized_keys and systemd-networkd
sudo lsinitrd /boot/initrd.img-"$(uname -r)" | grep -E 'bin/sshd$|authorized_keys$|systemd-networkd$'
# systemd-networkd
# -rw-------   1 root     root          270 Nov 16 12:18 root/.ssh/authorized_keys
# -rwxr-xr-x   1 root     root      1891048 Sep 16 16:55 usr/lib/systemd/systemd-networkd
# -rwxr-xr-x   1 root     root       408536 Oct  8 18:36 usr/sbin/sshd

# Show the initrd host key's fingerprint, to compare at the first unlock from the Mac
ssh-keygen -lf /etc/ssh/dracut_ssh_host_ed25519_key.pub
# 256 SHA256:FWGJEnymGxa1563p16MDF0GPqw5ALgTDDxsAzQbGrZM dell-wyse-initrd (ED25519)
Keep in mind:
- The module is outside package management; update it from
~/dracut-sshdwhen a new release comes out (section 10.6). - Your keys: after changing them, update
/etc/dracut-sshd/authorized_keysand rebuild the initrd. - The initrd’s host key can be read by anyone with the SSD, because
/bootis not encrypted. - Root: the system’s own SSH still refuses root logins, because of the drop-in installed above; only the initrd accepts them.
- The initrd’s network: DHCP on every wired interface, with the MAC address as client ID, so the FRITZ!Box reservation gives the initrd
192.168.178.55as well.
On your Mac, add two host entries to ~/.ssh/config:
Host dell-wyse-lan
    HostName 192.168.178.55
    User wmutschl
    IdentityFile ~/.ssh/id_ed25519
    IdentitiesOnly yes

Host dell-wyse-unlock
    HostName 192.168.178.55
    User root
    HostKeyAlias dell-wyse-initrd
    IdentityFile ~/.ssh/id_ed25519
    IdentitiesOnly yes
Only the initrd entry needs HostKeyAlias: ssh stores and checks the initrd’s host key under dell-wyse-initrd, apart from the system’s key, which answers on the same address.
dell-wyse-lan keeps using the key stored for 192.168.178.55 at your first login above.
IdentityFile names the key you authorized above; adjust it if yours has another name.
IdentitiesOnly makes ssh offer only that key, not every key in your agent: with many keys loaded, both servers would otherwise give up after six wrong ones with “Too many authentication failures”.
Test it by rebooting:
sudo reboot now
Wait half a minute, then connect from the Mac and compare the fingerprint with the one printed above:
ssh dell-wyse-unlock
# The authenticity of host 'dell-wyse-initrd (192.168.178.55)' can't be established.
# ED25519 key fingerprint is: SHA256:FWGJEnymGxa1563p16MDF0GPqw5ALgTDDxsAzQbGrZM
# This key is not known by any other names.
# Are you sure you want to continue connecting (yes/no/[fingerprint])? yes
# Warning: Permanently added 'dell-wyse-initrd' (ED25519) to the list of known hosts.
#
# Welcome to the early boot SSH environment. You may type
#
#     systemd-tty-ask-password-agent
#
# (or press "arrow up") to unlock your disks.
#
# This shell will terminate automatically a few seconds after the
# unlocking process has succeeded and when the boot proceeds.
In the initrd’s shell, answer the prompt:
systemd-tty-ask-password-agent
The boot continues and the connection closes.
Reconnect via SSH as usual and check that the network came up from Netplan, not from the initrd.
The output must name /run/systemd/network/10-netplan-enp1s0.network:
networkctl status enp1s0 | grep 'Network File'
# Network File: /run/systemd/network/10-netplan-enp1s0.network
Every reboot from now on ends the same way. From the Mac, the unlock also works in one step:
ssh -t dell-wyse-unlock systemd-tty-ask-password-agent
Kernel updates need nothing: dracut’s kernel hook builds every new initrd with the same module, keys and settings. See dracut-sshd and systemd-tty-ask-password-agent for more details.
systemd-cryptsetup gives up, and about three minutes later dracut starts its emergency shell on the console.
SSH still works: run systemctl restart 'systemd-cryptsetup@*', then systemd-tty-ask-password-agent, and finally systemctl stop dracut-emergency.service, which ends the console’s emergency shell, so that the boot continues.
Alternatively, run reboot and unlock again.6 Install Docker with storage safeguards
Docker comes from its own signed repository for Ubuntu.
This section assumes that Docker has never been installed or used on this host.
If docker is already installed, inspect its workloads and storage before changing anything.
Never remove conflicting packages from an active host without a migration plan.
Fresh installations of Docker 29 and later use the containerd image store: images and snapshots live in /var/lib/containerd, named volumes and Docker’s configuration in /var/lib/docker.
Both paths keep their defaults and sit on their own subvolumes (section 4); Docker’s BTRFS storage driver is not forced.
The default overlayfs snapshotter works on BTRFS and is the intended setup; the checks after the installation confirm that the host really uses it.
See Docker’s image store and the storage driver guidance for details.
6.1 Safeguards before Docker’s first start
Before the package installation starts Docker for the first time, two safeguards must be in place: Docker must refuse to start without its mounts, and container logs must be bounded before the first container exists. Three files from the repository take care of that:
/etc/systemd/system/docker.service.d/storage.conf: Docker requires, and asserts, the mounts/home,/var/lib/docker,/var/lib/containerdand/srv/nextcloud./homeis included because the sidecar bind-mounts its configuration from~/scripts/Tailscale./etc/systemd/system/containerd.service.d/storage.conf: the same for containerd and/var/lib/containerd./etc/docker/daemon.json:"log-driver": "local".
On Ubuntu:
findmnt -t btrfs -o TARGET,FSROOT,FSTYPE
# TARGET                FSROOT       FSTYPE
# /                     /@root       btrfs
# ├─/home               /@home       btrfs
# ├─/mnt/wyse-top       /            btrfs
# ├─/srv/nextcloud      /@nextcloud  btrfs
# ├─/srv/ha-backups     /@ha-backups btrfs
# ├─/var/lib/docker     /@docker     btrfs
# └─/var/lib/containerd /@containerd btrfs
# Continue only if every path is mounted from the subvolume shown above

sudo install -d -m 0755 /srv/nextcloud/data

cd ~/scripts/Dell-Wyse-Thin-Client-5070
sudo install -D -m 0644 etc/systemd/system/docker.service.d/storage.conf /etc/systemd/system/docker.service.d/storage.conf
sudo install -D -m 0644 etc/systemd/system/containerd.service.d/storage.conf /etc/systemd/system/containerd.service.d/storage.conf
sudo install -D -m 0644 etc/docker/daemon.json /etc/docker/daemon.json
sudo systemctl daemon-reload
The two drop-ins stop Docker from silently starting its restart-policy containers against empty directories on the root filesystem when the dedicated mounts are missing.
6.2 Installation
Add Docker’s package repository and its signing key:
sudo install -m 0755 -d /etc/apt/keyrings
sudo curl -fsSL https://download.docker.com/linux/ubuntu/gpg \
  -o /etc/apt/keyrings/docker.asc
sudo chmod a+r /etc/apt/keyrings/docker.asc
sudo tee /etc/apt/sources.list.d/docker.sources >/dev/null <<EOF
Types: deb
URIs: https://download.docker.com/linux/ubuntu
Suites: $(. /etc/os-release && echo "${UBUNTU_CODENAME:-$VERSION_CODENAME}")
Components: stable
Architectures: $(dpkg --print-architecture)
Signed-By: /etc/apt/keyrings/docker.asc
EOF
Then install the engine, its command-line client, containerd and the Compose plugin. The installation starts Docker right away, which is why the safeguards above had to come first:
sudo apt update
sudo apt install --no-install-recommends -y docker-ce docker-ce-cli containerd.io docker-compose-plugin
sudo systemctl enable --now containerd.service docker.service
Check the result:
# Docker Engine 29 and the Compose plugin
sudo docker version --format '{{.Server.Version}}'
# 29.9.3
sudo docker compose version --short
# 5.7.1

# Storage: overlayfs through the containerd image store
sudo docker info --format '{{.Driver}} {{json .DriverStatus}}'
# overlayfs [["driver-type","io.containerd.snapshotter.v1"]]

# Logging: the repository's daemon.json is valid and in use
sudo dockerd --validate --config-file=/etc/docker/daemon.json
# configuration OK
sudo docker info --format '{{.LoggingDriver}}'
# local

# A first container
sudo docker run --rm hello-world
If a check fails, investigate before you deploy Nextcloud AIO.
Do not change the storage backend later: images and containers created with one backend are invisible to the other.
The local log driver rotates its logs by default; containers that set their own log options keep them.
See the Docker installation guide and Docker logging for details.
Access to Docker is effectively root access to the host: whoever can talk to the Docker socket can start a container that mounts / and change anything there.
Docker’s post-installation guide offers the docker group for convenience, but warns that the group grants root-level privileges.
For your account, that would mean root without a password prompt and without an entry in the sudo log, for you and for anything that runs as you.
So keep using sudo docker, as every command in this guide does, and never expose the Docker API over TCP.
Keep Docker’s firewall integration enabled.
Do not apply global privilege-removal or userns-remap templates to this Nextcloud AIO setup: the mastercontainer needs the Docker API, and Docker 29 does not support the containerd image store with userns-remap.
The daemon would fall back to the classic storage driver and hide all existing images and containers.
See Docker security, Docker’s post-installation steps and the Nextcloud AIO deployment definition for details.
7 Backup disks, snapshots, alerts and the Home Assistant share
Set this up before either Nextcloud path, so that the first data already lands on snapshotted, backed-up and monitored storage.
| Job | When | From → to | Reports to healthchecks.io as |
|---|---|---|---|
| BTRBK snapshot | Hourly | Live subvolumes → @snapshots on the Vi560 | dell-wyse-btrbk-snapshot |
| BTRBK send/receive | Daily, 01:30 | @snapshots → HDD 1, /mnt/btrbk/wyse | dell-wyse-btrbk-send |
| AIO Borg backup | Daily, 03:00 UTC, i.e. 04:00 CET or 05:00 CEST (set in AIO, section 10.1) | Nextcloud → HDD 2, /mnt/backup/borg | AIO notifies its administrators; the off-site job notices a backup that never ran |
| Home Assistant backup | Daily, at HA’s “System optimal” time | Pi → /srv/ha-backups, then to HDD 1 with the next daily send | dell-wyse-ha-backup-check, daily at 07:00 |
| Off-site mirror | Daily, 06:30, once AIO’s backup has finished | Borg repository and /srv/ha-backups → Storage Box | dell-wyse-offsite |
| BTRFS scrub | Monthly, on the 1st at 10:00 | Vi560 and both HDDs | dell-wyse-scrub |
| SMART monitoring | Continuously; self-tests weekly and monthly | Vi560 and both HDDs | dell-wyse-smartd, failures only |
| Uptime | Every five minutes | – | dell-wyse-alive |
The layers do different jobs:
- Snapshots are atomic per subvolume, like the state after a power cut.
They are the quickest way to get back a deleted folder, a previous HA backup, or the host before a bad change.
PostgreSQL in
@dockerrecovers from such a crash-consistent state.@dockerand@nextcloudare snapshotted a moment apart, though, so database and files from snapshots can disagree slightly. - Borg, through AIO, stops the containers while it backs up. It is the consistent copy to restore the Nextcloud application from (Path B).
- The off-site mirror is a copy of the already encrypted Borg repository and HA backups outside the house, for the day the house loses all three disks. The Storage Box’s own snapshots protect it against a sync that copies damage or deletions.
- Not snapshotted:
@containerd, because images are downloaded again, and@snapshotsitself.
Install the packages, then put the backup configuration, the dell-wyse-* units and their scripts in place:
# Install BTRBK, Samba, cryptsetup, and parted for partitioning the HDDs in section 7.2
sudo apt install --no-install-recommends btrbk samba cryptsetup parted -y

# Disable BTRBK's own timer, if the package ships one; the dell-wyse-* timers replace it
systemctl list-unit-files 'btrbk*'
# UNIT FILE     STATE   PRESET
# btrbk.service static  -
# btrbk.timer   enabled enabled
# 2 unit files listed.
sudo systemctl disable --now btrbk.timer
# Removed '/etc/systemd/system/timers.target.wants/btrbk.timer'.

# Copy the configuration, units and scripts from the repository
cd ~/scripts/Dell-Wyse-Thin-Client-5070
sudo install -D -m 0644 etc/btrbk/btrbk.conf /etc/btrbk/btrbk.conf
sudo install -D -m 0644 etc/samba/smb.conf /etc/samba/smb.conf
sudo install -D -m 0644 etc/smartd.conf /etc/smartd.conf
sudo install -m 0644 etc/systemd/system/dell-wyse-* /etc/systemd/system/
sudo install -m 0755 usr/local/sbin/dell-wyse-* /usr/local/sbin/
sudo systemctl daemon-reload

# Create the settings file from its template, but never overwrite an existing one
[ -e /etc/dell-wyse/host.env ] ||
  sudo install -D -m 0600 host.env.example /etc/dell-wyse/host.env

# Restart Samba with the new configuration, so the package's default shares disappear right away
sudo systemctl restart smbd
| Installed on the Wyse | Purpose |
|---|---|
/usr/local/sbin/dell-wyse-hc-ping, dell-wyse-fail@.service | Success and failure pings to healthchecks.io (7.1) |
dell-wyse-alive.timer | Uptime ping (7.1) |
/etc/btrbk/btrbk.conf, dell-wyse-btrbk-snapshot.timer, dell-wyse-btrbk-send.timer | Snapshots and send/receive (7.3) |
dell-wyse-scrub.timer, /etc/smartd.conf, /usr/local/sbin/dell-wyse-smartd-alert | Disk health (7.4) |
/etc/samba/smb.conf, dell-wyse-ha-backup-check.timer and its script | Home Assistant share and its daily check (7.5) |
dell-wyse-offsite.timer, /usr/local/sbin/dell-wyse-offsite | Off-site mirror on the Storage Box (7.6) |
/etc/dell-wyse/host.env | Secrets and settings, created once from the template with mode 600, never overwritten |
The units live in /etc/systemd/system, and every job follows the same pattern.
On success, it pings its own check, named like the unit.
On failure, dell-wyse-fail@ sends a failure ping that carries the unit’s last 40 log lines.
A run that never happens, because the Wyse is off, a disk is missing or a timer stopped, shows up when the expected ping does not arrive.
7.1 Alerts to healthchecks.io
In healthchecks.io, open the project for your machines and create a ping key in its Settings. With it, every check has a URL of the form
https://hc-ping.com/<ping key>/<check name>, and?create=1, which the script adds, creates each check on its first ping. One key serves all jobs. Add integrations for the notifications, such as email and Signal.Enter the key as
HC_PING_KEYin the host’s settings file. The off-site values follow in section 7.6:sudoedit /etc/dell-wyse/host.envTest both directions on the uptime check itself, so that no test check is left to delete. The first command creates the check
dell-wyse-aliveand sets it to down; check that the alert reached you through your usual integration. The other two start the uptime ping. Its timer first fires at the next full five minutes, so the last command sends a ping through the unit right away. That sets the check back to up and tests the same path that the timer takes:sudo dell-wyse-hc-ping alive fail 'Test alert from the Wyse' sudo systemctl enable --now dell-wyse-alive.timer sudo systemctl start dell-wyse-alive.serviceEach job creates its check on its first run, with healthchecks.io’s defaults of a 1-day period and a 1-hour grace time. Once the checks appear, set their period and grace time:
Check Period Grace dell-wyse-alive5 minutes 1 minute dell-wyse-btrbk-send1 day 6 hours dell-wyse-btrbk-snapshot1 hour 1 hour dell-wyse-ha-backup-check1 day 2 hours dell-wyse-offsite1 day 6 hours dell-wyse-scrub31 days 2 days dell-wyse-smartd365 days Any; it only receives failures The longest run, a send after an import, can overrun its grace time once; that alert is expected. The first off-site upload takes days, but its check appears only when that run ends (section 7.6, step 6).
Failure pings carry log lines to healthchecks.io: unit names, paths and error messages, nothing from the files themselves. Nothing else from these jobs leaves the host. Nextcloud AIO reports its own backup failures as a Nextcloud notification to the administrators, so make sure those reach you, for example through the administrator’s email address.
7.2 Prepare the two HDDs
Attach both HDDs, ideally on their own power supplies. Identify each by model, serial and size.
Put the two HDDs on different USB hubs.
The Wyse’s blue USB 3 ports do not each have their own line to the USB controller.
The four rear ports share one internal 4-port hub, and the front blue port sits on a separate 2-port hub.
The two front black ports are USB 2 only and too slow for a disk; leave them for a keyboard receiver or an installer stick.
Connect HDD 1 to a rear port and HDD 2 to the front blue port.
Then a reset or power dip on one hub no longer takes out both backup disks at once, and the spin-up current of two bus-powered drives is spread over two hubs.
Speed hardly changes, because the jobs that use the two disks rarely run at the same time.
HDD 2 goes in front because an interrupted Borg backup recovers on its own, so a bumped cable costs less there; HDD 1 stays at the back, out of the way.
No configuration depends on the port, so you can move a disk later: unmount it first, for example with sudo systemctl stop mnt-backup.mount, then mount it again and restart smartd.
To see which hub each disk is on:
lsusb -t
for d in /sys/block/sd?; do readlink -f $d | tr / '\n' | grep -E '^[0-9]+-[0-9.]+$' | tail -1 |
  sed "s/^/$(basename $d) $(cat $d/device/model) -> /"; done
# sdb Elements 2621    -> 2-1.1
# sdc External USB 3.0 -> 2-6.2
2-1.x is the rear hub and 2-6.x the front one; both should show 5000M in lsusb -t.
Seen from the back of the Wyse, the rear ports map like this:
| Rear port | Address |
|---|---|
| Top left | 2-1.1 |
| Top right | 2-1.2 |
| Bottom left | 2-1.3 |
| Bottom right | 2-1.4 |
The front ports, from top to bottom:
| Front port | Address |
|---|---|
| USB-C | 2-2 (USB 3, directly on the controller, no hub) |
| Blue USB-A | 2-6.2 (USB 3) |
| Upper black USB-A | 1-3 (USB 2 only) |
| Lower black USB-A | 1-4 (USB 2 only) |
A USB 3 device in a black port runs at 480M, under bus 1 in lsusb -t.
The USB-C port would also work for a disk, through a USB-C cable or adapter, and shares nothing with the other ports.
A disk at the back is still less likely to be knocked loose than one hanging off an adapter in front, so the layout above stays my recommendation.
- HDD 1 receives plain copies of every snapshotted subvolume, including all user files and
~/scripts/Dell-Wyse-Thin-Client-5070/.envwith the OAuth secret, so it gets LUKS2 encryption. A random keyfile on the encrypted SSD unlocks it at boot without a prompt. HDD 1 is therefore exactly as safe as the SSD: lost, stolen, returned under warranty or thrown away, on its own or together with the SSD, it exposes nothing. The keyfile lives inside the encrypted SSD, so reaching it takes the SSD’s passphrase.luksFormatalso asks for a passphrase of HDD 1’s own. Generate a long one in your password manager and keep it there: it is the only way into HDD 1 once the SSD, and the keyfile with it, is gone, which is exactly when you need HDD 1. - HDD 2 needs no LUKS, because Borg encrypts the repository itself.
The J4105 has AES-NI, so the encryption costs nothing noticeable at USB HDD speeds (cryptsetup benchmark shows the numbers).
Which subsection comes next depends on what is on the HDDs:
- New HDDs, or disks with nothing you still need: section 7.2.1 erases, partitions and encrypts them.
- HDDs that already hold this guide’s backups, for example when you rebuild the Wyse after replacing the SSD or reinstalling Ubuntu, or move the disks to another Wyse: skip section 7.2.1, which would erase them, and follow section 7.2.2 instead.
- One new HDD next to one that still holds backups, for example a replacement for a failed HDD 2: in section 7.2.1, set the new disk’s variable in the first block and run only that disk’s block; leave the other disk as it is, or reuse it as in section 7.2.2 when you rebuild the Wyse. On a Wyse that is already set up, the note Replacing a single HDD at the start of section 7.2.3 says what to do next.
Both paths continue with section 7.2.3, in the same terminal session, because its commands rely on the HDD1 shell variable.
7.2.1 New HDDs: partition and encrypt
wyse-btrbk-luks and wyse-borg, belong in section 7.2.2, whichever Wyse they come from.The parted, wipefs, luksFormat and mkfs lines erase the named disk, so check the paths twice.
Each disk has its own block, so that you can also prepare a single new disk without touching the other one; in that case, set and use only the new disk’s variable.
Each block starts with a check that prints the disk’s labels if it already holds any of this guide’s backups: if it prints anything, stop.
Enter the commands one by one in the same terminal session, because they rely on the HDD1 and HDD2 shell variables:
# List the disks and their by-id paths; identify both HDDs by model, serial and size
lsblk -o NAME,SIZE,MODEL,SERIAL,FSTYPE,MOUNTPOINTS
# sdb              5.5T WDC WD60NDZW-11C8XS0 WD-WX62D343TDXJ
# ├─sdb1           200M                                      vfat
# └─sdb2           5.5T                                      apfs
# sdc              3.6T TOSHIBA MQ04UBB400   X0S7T0TWT
# ├─sdc1           200M                                      vfat
# └─sdc2           3.6T                                      apfs
ls -l /dev/disk/by-id/usb-*
# lrwxrwxrwx 1 root root  9 Nov 16 13:29 /dev/disk/by-id/usb-TOSHIBA_External_USB_3.0_20201028020375F-0:0 -> ../../sdc
# lrwxrwxrwx 1 root root 10 Nov 16 13:29 /dev/disk/by-id/usb-TOSHIBA_External_USB_3.0_20201028020375F-0:0-part1 -> ../../sdc1
# lrwxrwxrwx 1 root root 10 Nov 16 13:29 /dev/disk/by-id/usb-TOSHIBA_External_USB_3.0_20201028020375F-0:0-part2 -> ../../sdc2
# lrwxrwxrwx 1 root root  9 Nov 16 13:29 /dev/disk/by-id/usb-WD_Elements_2621_57583632443334335444584A-0:0 -> ../../sdb
# lrwxrwxrwx 1 root root 10 Nov 16 13:29 /dev/disk/by-id/usb-WD_Elements_2621_57583632443334335444584A-0:0-part1 -> ../../sdb1
# lrwxrwxrwx 1 root root 10 Nov 16 13:29 /dev/disk/by-id/usb-WD_Elements_2621_57583632443334335444584A-0:0-part2 -> ../../sdb2

# Set the whole-disk paths of both HDDs (no -partN suffix; use the TAB key to complete the path)
HDD1=/dev/disk/by-id/usb-WD_Elements_2621_57583632443334335444584A-0:0
HDD2=/dev/disk/by-id/usb-TOSHIBA_External_USB_3.0_20201028020375F-0:0

# Confirm the choice: both disks with the expected model, serial and size, and nothing mounted
lsblk -o NAME,MODEL,SERIAL,SIZE,FSTYPE,MOUNTPOINTS "$HDD1" "$HDD2"
# NAME   MODEL                SERIAL           SIZE FSTYPE MOUNTPOINTS
# sdb    WDC WD60NDZW-11C8XS0 WD-WX62D343TDXJ  5.5T
# ├─sdb1                                       200M vfat
# └─sdb2                                       5.5T apfs
# sdc    TOSHIBA MQ04UBB400   X0S7T0TWT        3.6T
# ├─sdc1                                       200M vfat
# └─sdc2                                       3.6T apfs
HDD 1. Skip this block when you replace only HDD 2:
# Stop if this prints anything: the disk then holds this guide's backups (section 7.2.2)
lsblk -no LABEL "${HDD1:?is not set}" | grep -xE 'wyse-btrbk-luks|wyse-btrbk|wyse-borg'

# Erase HDD 1, give it one GPT partition and remove leftover signatures, such as a factory NTFS
sudo parted -s "$HDD1" mklabel gpt mkpart btrbk 1MiB 100%
sudo udevadm settle
sudo wipefs -a "$HDD1"-part1

# Create HDD 1's random keyfile on the encrypted SSD, readable by root only
sudo install -d -m 0700 /etc/cryptsetup-keys.d
sudo sh -c 'umask 077; head -c 64 /dev/urandom > /etc/cryptsetup-keys.d/wyse-btrbk.key'

# Encrypt HDD 1: luksFormat asks for YES and the new passphrase twice, luksAddKey for that passphrase once more
sudo cryptsetup luksFormat --type luks2 --label wyse-btrbk-luks "$HDD1"-part1
sudo cryptsetup luksAddKey "$HDD1"-part1 /etc/cryptsetup-keys.d/wyse-btrbk.key

# Open HDD 1 with the keyfile, create its BTRFS filesystem and close it again
sudo cryptsetup open --key-file /etc/cryptsetup-keys.d/wyse-btrbk.key "$HDD1"-part1 wyse-btrbk
sudo mkfs.btrfs -L wyse-btrbk /dev/mapper/wyse-btrbk
# Label:              wyse-btrbk
# UUID:               4b86cac9-cb64-4b82-aae3-05808b66c6ec
# Node size:          16384
# Sector size:        4096	(CPU page size: 4096)
# Filesystem size:    5.46TiB
# Block group profiles:
#   Data:             single            8.00MiB
#   Metadata:         DUP               1.00GiB
#   System:           DUP               8.00MiB
# SSD detected:       no
# Zoned device:       no
# Features:           extref, skinny-metadata, no-holes, free-space-tree
# Checksum:           crc32c
# Number of devices:  1
# Devices:
#    ID        SIZE  PATH
#     1     5.46TiB  /dev/mapper/wyse-btrbk
sudo cryptsetup close wyse-btrbk
HDD 2. Skip this block when you replace only HDD 1:
# Stop if this prints anything: the disk then holds this guide's backups (section 7.2.2)
lsblk -no LABEL "${HDD2:?is not set}" | grep -xE 'wyse-btrbk-luks|wyse-btrbk|wyse-borg'

# Erase HDD 2, give it one GPT partition and remove leftover signatures, such as a factory NTFS
sudo parted -s "$HDD2" mklabel gpt mkpart borg btrfs 1MiB 100%
sudo udevadm settle
sudo wipefs -a "$HDD2"-part1

# Create HDD 2's BTRFS filesystem, without LUKS
sudo mkfs.btrfs -L wyse-borg "$HDD2"-part1
# Label:              wyse-borg
# UUID:               63bbf56c-2f0e-48f8-a527-7bd66b4c3aa0
# Node size:          16384
# Sector size:        4096	(CPU page size: 4096)
# Filesystem size:    3.64TiB
# Block group profiles:
#   Data:             single            8.00MiB
#   Metadata:         DUP               1.00GiB
#   System:           DUP               8.00MiB
# SSD detected:       no
# Zoned device:       no
# Features:           extref, skinny-metadata, no-holes, free-space-tree
# Checksum:           crc32c
# Number of devices:  1
# Devices:
#    ID        SIZE  PATH
#     1     3.64TiB  /dev/disk/by-id/usb-TOSHIBA_External_USB_3.0_20201028020375F-0:0-part1
Check the result:
# Verify: partition btrbk holds crypto_LUKS (wyse-btrbk-luks), partition borg holds btrfs (wyse-borg)
lsblk -o NAME,SIZE,PARTLABEL,FSTYPE,LABEL "$HDD1" "$HDD2"
# NAME    SIZE PARTLABEL FSTYPE      LABEL
# sdb     5.5T
# └─sdb1  5.5T btrbk     crypto_LUKS wyse-btrbk-luks
# sdc     3.6T
# └─sdc1  3.6T borg      btrfs       wyse-borg
Optional: back up HDD 1’s LUKS header to your password manager.
sudo cryptsetup luksHeaderBackup "$HDD1"-part1 --header-backup-file ~/wyse-btrbk-luks-header.img
sudo chown "$USER" ~/wyse-btrbk-luks-header.img
Store the header backup in your password manager next to HDD 1’s passphrase, as for the SSD’s header in section 3.4, then delete it from the Wyse. If the LUKS header on the disk is ever damaged, that file and the passphrase are the only way back in.
Both disks get BTRFS for checksums and scrub; HDD 1 needs it anyway to receive snapshots. Continue with section 7.2.3; when you replace a single HDD on a Wyse that is already set up, follow only its first note.
7.2.2 Rebuilding the Wyse: reuse the HDDs
When you rebuild the Wyse, both HDDs keep their contents, and they hold your backups.
So this subsection only identifies them and gets back HDD 1’s keyfile; nothing here erases or formats a disk.
Enter the commands one by one in the same terminal session that you then use for section 7.2.3, because they rely on the HDD1 and HDD2 shell variables:
# List the disks and their by-id paths; identify both HDDs by model, serial and size
lsblk -o NAME,SIZE,MODEL,SERIAL,FSTYPE,LABEL,MOUNTPOINTS
ls -l /dev/disk/by-id/usb-*

# Set the whole-disk paths of both HDDs (no -partN suffix; use the TAB key to complete the path)
HDD1=/dev/disk/by-id/usb-WD_Elements_2621_57583632443334335444584A-0:0
HDD2=/dev/disk/by-id/usb-TOSHIBA_External_USB_3.0_20201028020375F-0:0

# Confirm: partition btrbk holds crypto_LUKS (wyse-btrbk-luks), partition borg holds btrfs (wyse-borg)
lsblk -o NAME,SIZE,PARTLABEL,FSTYPE,LABEL "$HDD1" "$HDD2"
# NAME    SIZE PARTLABEL FSTYPE      LABEL
# sdb     5.5T
# └─sdb1  5.5T btrbk     crypto_LUKS wyse-btrbk-luks
# sdc     3.6T
# └─sdc1  3.6T borg      btrfs       wyse-borg
HDD 1’s keyfile went with the old SSD, but a copy sits inside HDD 1’s newest @root backup.
Unlock HDD 1 once with its passphrase from your password manager and take the keyfile from there:
sudo cryptsetup open "$HDD1"-part1 wyse-btrbk
tmp=$(mktemp -d)
sudo mount -o ro /dev/mapper/wyse-btrbk "$tmp"
latest=$(sudo sh -c "ls -d '$tmp'/wyse/@root.* | tail -n 1")
sudo install -d -m 0700 /etc/cryptsetup-keys.d
sudo install -m 0400 "$latest/etc/cryptsetup-keys.d/wyse-btrbk.key" /etc/cryptsetup-keys.d/wyse-btrbk.key
sudo umount "$tmp"
rmdir "$tmp"
sudo cryptsetup close wyse-btrbk
The new SSD’s subvolumes are new to BTRBK, so its first send to HDD 1 is a full copy again. It sits next to the old backups until the retention removes them, which takes up to twelve months; delete the oldest old backups by hand if HDD 1 runs short of space.
7.2.3 Unlock and mount the HDDs at boot
Replacing a single HDD on a Wyse that is already set up?
Then skip the block below: its crypttab and fstab lines already exist.
After preparing the new disk with its block in section 7.2.1, do only this:
New HDD 2: its fstab line finds it by its label wyse-borg, so mount it with sudo systemctl start mnt-backup.mount.
HDD 2’s line in the repository’s smartd.conf names the old disk by its by-id path, which contains its serial number: change it to the new disk’s path, or remove it if the new USB bridge reports standby (section 7.4), and copy the file again.
Then copy the Borg repository back from the Storage Box (section 7.7).
New HDD 1: point the existing wyse-btrbk line in /etc/crypttab at the new disk’s LUKS UUID, then mount it.
The next daily send copies everything again in full.
luks_uuid=$(sudo cryptsetup luksUUID "$HDD1"-part1)
[ -n "$luks_uuid" ] && sudo sed -i -E "s|^(wyse-btrbk[[:space:]]+)UUID=[^[:space:]]+|\1UUID=$luks_uuid|" /etc/crypttab
grep '^wyse-btrbk ' /etc/crypttab
sudo systemctl daemon-reload
sudo systemctl start mnt-btrbk.mount
sudo install -d -m 0700 /mnt/btrbk/wyse
Either disk: smartd scans for disks only when it starts, so finish with sudo systemctl restart smartmontools.service and check its journal as in section 7.4.
Now let systemd unlock and mount both HDDs.
HDD 2 is mounted without compression, because Borg data is already compressed and encrypted.
The crypttab line unlocks HDD 1 with the keyfile whenever the disk is present, and nofail lets Ubuntu boot without either disk.
key-slot=1 points the keyfile straight at its own keyslot: luksFormat put the passphrase in slot 0, and luksAddKey put the keyfile in slot 1.
Without it, cryptsetup tries the keyslots in order, so the keyfile first goes through slot 0’s full Argon2id key derivation and fails before it reaches slot 1.
On the J4105, every derivation takes seconds, so this roughly halves the unlock time.
Unlocking still takes several seconds, so the fstab line for HDD 1 waits up to 20 seconds for the unlocked device; the other timeouts only wait for a disk to appear.
HDD 1’s drive supports TRIM, but the WD Elements’ USB bridge rejects it (WRITE SAME(16): invalid command operation code), so the crypttab line has no discard.
The immutable flag on the empty mount points makes every write fail while a disk is missing.
That matters because the root filesystem is BTRFS too: without it, BTRBK would happily receive its snapshots onto the SSD.
sudo install -d -m 0755 /mnt/btrbk /mnt/backup
sudo chattr +i /mnt/btrbk /mnt/backup
# The keyfile must open slot 1, which the crypttab line below relies on
sudo cryptsetup open --test-passphrase --key-slot 1 --key-file /etc/cryptsetup-keys.d/wyse-btrbk.key "$HDD1"-part1 && echo 'slot 1 ok'
# slot 1 ok
luks_uuid=$(sudo cryptsetup luksUUID "$HDD1"-part1)
echo "wyse-btrbk  UUID=$luks_uuid  /etc/cryptsetup-keys.d/wyse-btrbk.key  luks,key-slot=1,nofail,x-systemd.device-timeout=10s" |
  sudo tee -a /etc/crypttab
sudo tee -a /etc/fstab >/dev/null <<'FSTAB'
/dev/mapper/wyse-btrbk  /mnt/btrbk   btrfs  defaults,noatime,compress=zstd:3,nofail,x-systemd.device-timeout=20s  0 0
LABEL=wyse-borg         /mnt/backup  btrfs  defaults,noatime,nofail,x-systemd.device-timeout=10s                  0 0
FSTAB
sudo systemctl daemon-reload
sudo systemctl start mnt-btrbk.mount mnt-backup.mount

sudo findmnt --verify --verbose
# Success, no errors or warnings detected
findmnt /mnt/btrbk
# TARGET     SOURCE                 FSTYPE OPTIONS
# /mnt/btrbk /dev/mapper/wyse-btrbk btrfs  rw,noatime,compress=zstd:3,space_cache=v2,subvolid=5,subvol=/
findmnt /mnt/backup
# TARGET      SOURCE    FSTYPE OPTIONS
# /mnt/backup /dev/sdc1 btrfs  rw,noatime,space_cache=v2,subvolid=5,subvol=/

sudo install -d -m 0700 /mnt/btrbk/wyse
Starting mnt-btrbk.mount unlocks HDD 1 through the same systemd-cryptsetup unit that runs at boot, so this already tests the keyfile unlock that the boot uses.
A disk attached later is unlocked and mounted by the next job that needs it.
7.3 Hourly snapshots and daily send/receive with BTRBK
The /etc/btrbk/btrbk.conf copied at the start of section 7 snapshots the five subvolumes that hold state into @snapshots, keeps 48 hourly and 7 daily snapshots on the SSD, and keeps 30 daily, 12 weekly and 12 monthly copies on HDD 1.
Check the configuration and send the first copies:
sudo btrbk dryrun
sudo btrbk run
sudo btrbk list latest
# SOURCE_SUBVOLUME           SNAPSHOT_SUBVOLUME                                  STATUS      TARGET_SUBVOLUME
# /mnt/wyse-top/@root        /mnt/wyse-top/@snapshots/@root.20261116T1355        -           /mnt/btrbk/wyse/@root.20261116T1355
# /mnt/wyse-top/@home        /mnt/wyse-top/@snapshots/@home.20261116T1355        up-to-date  /mnt/btrbk/wyse/@home.20261116T1355
# /mnt/wyse-top/@docker      /mnt/wyse-top/@snapshots/@docker.20261116T1355      up-to-date  /mnt/btrbk/wyse/@docker.20261116T1355
# /mnt/wyse-top/@nextcloud   /mnt/wyse-top/@snapshots/@nextcloud.20261116T1355   up-to-date  /mnt/btrbk/wyse/@nextcloud.20261116T1355
# /mnt/wyse-top/@ha-backups  /mnt/wyse-top/@snapshots/@ha-backups.20261116T1355  up-to-date  /mnt/btrbk/wyse/@ha-backups.20261116T1355
The first run sends complete copies.
Doing it now, while the subvolumes are nearly empty, keeps it short; every later send is incremental.
After a restore or an import, the next daily send carries the new data once, which takes a few hours to days on a USB HDD.
Hung-task warnings from HDD 1 during large sends.
The WD Elements used as HDD 1 here, a 2.5″ WD60NDZW, is a drive-managed SMR disk: once its internal cache fills, scattered writes slow to a crawl.
A send that carries a lot of new data, especially many small files such as freshly pulled Docker images, is exactly that.
The Wyse’s RAM buffers gigabytes of it, and at the end of each subvolume btrfs receive sets the copy read-only, which forces a transaction commit that has to wait for all of it to reach the disk.
If that takes longer than two minutes, the kernel logs messages like these, which sudo dmesg --level=err shows:
INFO: task btrfs-transacti:7587 blocked for more than 122 seconds.
INFO: task btrfs:376545 blocked for more than 245 seconds.
The call traces show btrfs_btree_wait_writeback_range and btrfs_ioctl_subvol_setflags.
This is a slow disk, not a failing one, as long as all of these hold:
dell-wyse-btrbk-send.servicestill finishes successfully, andsudo btrbk list latestshows today’s copies on HDD 1.sudo btrfs device stats --check /mnt/btrbkreports zero errors.- The kernel log shows no USB resets or
I/O errorlines for the disk:journalctl -k -b | grep -iE 'reset|I/O error'. sudo smartctl -aon HDD 1 shows no reallocated, pending or CRC errors.
The messages don’t name the filesystem.
Each mounted BTRFS has its own btrfs-transaction kernel thread, started when it was mounted, so ps -o pid,lstart,comm -C btrfs-transaction next to the mount times in journalctl -b | grep 'first mount' tells you which disk the PID belongs to.
To keep each nightly send short, upload or import large amounts of data in chunks of a few dozen GB per day rather than all at once.
Two timers split the work.
dell-wyse-btrbk-snapshot runs btrbk snapshot hourly, which creates and prunes snapshots on the SSD and only reads HDD 1 to find the latest snapshot/backup pair it must keep.
While HDD 1 is not mounted, BTRBK keeps every snapshot, so that the send can later catch up on the missed days, and the hourly job fails and alerts until HDD 1 is back.
dell-wyse-btrbk-send runs btrbk resume daily.
It sends every snapshot that HDD 1’s retention still needs, incrementally, including days missed while the disk was detached.
BTRBK always keeps the latest snapshot pair it needs for the next incremental send.
A shared flock makes the two wait for each other instead of failing.
The send timer first fires at 01:30, so the second command runs the send once right away.
It finds today’s copies already on HDD 1, finishes in seconds and creates the check dell-wyse-btrbk-send:
sudo systemctl enable --now dell-wyse-btrbk-snapshot.timer dell-wyse-btrbk-send.timer
sudo systemctl start dell-wyse-btrbk-send.service
systemctl list-timers 'dell-wyse-*'
# NEXT                            LEFT LAST                             PASSED UNIT                            ACTIVATES
# Mon 2026-11-16 14:00:00 CET 2min 48s Mon 2026-11-16 13:55:07 CET 2min 4s ago dell-wyse-alive.timer          dell-wyse-alive.service
# Mon 2026-11-16 14:00:00 CET 2min 48s -                                     - dell-wyse-btrbk-snapshot.timer dell-wyse-btrbk-snapshot.service
# Tue 2026-11-17 01:30:00 CET      11h -                                     - dell-wyse-btrbk-send.timer     dell-wyse-btrbk-send.service
Getting something back.
Nextcloud’s own trash and file versions come first.
Beyond those, snapshots are browsable read-only directories, named by subvolume and time: @snapshots on the SSD, /mnt/btrbk/wyse on HDD 1.
For a Nextcloud file, copy it back into the user’s folder with its ownership, then let Nextcloud index it:
sudo ls /mnt/wyse-top/@snapshots/
sudo cp -a --reflink=auto \
  '/mnt/wyse-top/@snapshots/@nextcloud.20261115T1400/data/USER_ID/files/FOLDER' \
  '/srv/nextcloud/data/USER_ID/files/FOLDER-restored'
sudo docker exec --user www-data nextcloud-aio-nextcloud \
  php occ files:scan --path='/USER_ID/files/FOLDER-restored'
Space freed by deleting large amounts of data, such as import staging, returns only when the last snapshot referencing it expires, after up to seven days on the SSD, as long as the daily send succeeds.
7.4 Disk health: monthly scrub and SMART monitoring
A scrub reads everything and verifies checksums.
It finds errors, but a single-copy data block cannot be repaired without another good copy; that is what the HDD copies are for.
dell-wyse-scrub runs on the first of the month at 10:00, away from the nightly jobs, and scrubs the Vi560 and both HDDs one after another.
Then it checks the error counters of all three with btrfs device stats --check, so read, write and checksum errors also fail the job.
The counters persist: after dealing with an error, reset them with sudo btrfs device stats -z on that filesystem, or every later scrub reports again.
The assertions make the job fail visibly if an HDD is missing, rather than scrubbing the SSD twice.
The timer first fires on the first of next month, so the second command runs the scrub once right away; while the disks hold little data, that takes about a minute.
It also creates the check dell-wyse-scrub now, so you can set its 31-day period (section 7.1) before healthchecks.io’s default of one day sends a false alert:
sudo systemctl enable --now dell-wyse-scrub.timer
sudo systemctl start dell-wyse-scrub.service
btrfs check --repair.
A full balance rewrites every block on the disk without any benefit here.
btrfs check --repair can turn a damaged but readable filesystem into a lost one; its manual reserves it for cases where a developer or an experienced user advises it, after you have accepted that it may fail.SMART catches a failing disk before BTRFS does.
The repository’s /etc/smartd.conf watches every disk smartd finds when it starts: overall health, error and self-test logs, attribute changes and temperature, with an alert at 60 °C.
It runs a short self-test every Sunday and a long one on the 15th of each month, both at 11:00, and does not wake HDDs in standby for its half-hourly checks.
Instead of sending mail, it hands each problem to dell-wyse-smartd-alert, which forwards it to the dell-wyse-smartd check.
The smartmontools package from section 5.1 pulls in no mail server.
Check that each disk answers, then restart smartd with the new configuration and confirm that it found all three:
sudo smartctl -H /dev/disk/by-id/ata-Verbatim_Vi560_493653348990842
sudo smartctl -H /dev/disk/by-id/usb-WD_Elements_2621_57583632443334335444584A-0:0
sudo smartctl -H /dev/disk/by-id/usb-TOSHIBA_External_USB_3.0_20201028020375F-0:0
sudo systemctl restart smartmontools.service
sudo journalctl -u smartmontools.service -b --no-pager
SMART on USB disks.
USB bridges differ in what they pass on to the drive, and smartctl and the journal show where yours falls short:
SMART Disabledfromsmartctl -H: the drive ships with SMART switched off. Switch it on once withsudo smartctl -s on /dev/disk/by-id/usb-…; the drive keeps the setting.- No answer without
-d sat: some enclosures answer only with-d satadded tosmartctl. Ifsmartdskips such a disk, list it in/etc/smartd.confby its/dev/disk/by-id/usb-…path with-d sat, as the file’s comment shows. not capable of SMART Health Status check: the bridge cannot pass on the drive’s own pass/fail verdict.smartdstill watches the attributes, the error and self-test logs and the temperature.no ATA CHECK POWER STATUS support, ignoring -n Directive:smartdcannot see that the disk sleeps and would wake it at every check. Give the disk a line of its own with a longer interval, such as-c i=21600for six hours, and-d removable, so thatsmartdstill starts while the disk is detached. The repository’ssmartd.confdoes this for HDD 2.
Make such changes in the repository, then copy smartd.conf again as at the start of section 7 and restart smartd.
smartd scans for disks only when it starts, so restart it also after attaching an HDD that was missing at boot.
Finally, test the alert path and set the check back to up:
sudo env SMARTD_DEVICE=/dev/test SMARTD_FAILTYPE=Test SMARTD_MESSAGE='Test alert' /usr/local/sbin/dell-wyse-smartd-alert
sudo dell-wyse-hc-ping smartd
7.5 Backup share for Home Assistant
Samba serves one share, ha-backups, to one account, and accepts connections only from the Raspberry Pi at 192.168.178.50.
Its configuration is the /etc/samba/smb.conf copied at the start of section 7: SMB 3 only, port 445 only, no NetBIOS, no guest access, no printing, and only the onboard interface enp1s0.
Change that interface name in the repository if yours differs, and copy the file again.
The backups land on the @ha-backups subvolume, so they are snapshotted hourly, reach HDD 1 every night and go off-site with the mirror.
Home Assistant encrypts them with the key from its emergency kit, so neither the share nor the off-site copy ever holds readable HA data.
My post Home Assistant OS on a Raspberry Pi 4 covers the Pi’s side in more detail.
7.5.1 Steps on the Wyse
sudo adduser --system --group --no-create-home --shell /usr/sbin/nologin hass-backup
sudo smbpasswd -a hass-backup
sudo chown hass-backup:hass-backup /srv/ha-backups
sudo chmod 0700 /srv/ha-backups
sudo testparm -s
sudo systemctl restart smbd

sudo ufw allow in on enp1s0 from 192.168.178.50 to any port 445 proto tcp
sudo ufw status verbose
# To                         Action      From
# --                         ------      ----
# 22/tcp on enp1s0           ALLOW IN    192.168.178.0/24
# 445/tcp on enp1s0          ALLOW IN    192.168.178.50

sudo ss -lntup | grep -E ':(139|445) '
# tcp   LISTEN 0      50                                  127.0.0.1:445       0.0.0.0:*    users:(("smbd",pid=8739,fd=31))
# tcp   LISTEN 0      50                             192.168.178.55:445       0.0.0.0:*    users:(("smbd",pid=8739,fd=28))
# tcp   LISTEN 0      50                                      [::1]:445          [::]:*    users:(("smbd",pid=8739,fd=32))
# tcp   LISTEN 0      50                            [fd00:db8::55]:445          [::]:*    users:(("smbd",pid=8739,fd=29))
# tcp   LISTEN 0      50                           [2001:db8::55]:445          [::]:*    users:(("smbd",pid=8739,fd=30))
Store the Samba password in your password manager.
ss should show smbd on port 445 only, and no NetBIOS port 139.
Substitute your interface name if it is not enp1s0.
7.5.2 Steps in Home Assistant on the Pi
- Settings → System → Storage → Add storage.
Name
dell_wyse(Home Assistant allows only letters, digits and underscores here), usage Backup, type Samba/Windows (CIFS), server192.168.178.55, remote shareha-backups, usernamehass-backupand its password. Select Connect. If it asks for a CIFS version, keep Auto (2.1+); the share requires SMB 3. - Settings → System → Backups → Configure backup settings.
Schedule daily backups at the System optimal time, set the retention, for example 7 backups, and turn on the location
dell_wyse. Pruned HA backups stay in the Wyse’s snapshots on HDD 1 for months, so a short retention is enough. Keep This system as well, for quick restores on the Pi itself. Leave encryption on fordell_wyse. - Download the emergency kit from the Encryption key card and store it in your password manager. Without that key, the backups on the Wyse and off-site cannot be restored.
- Create a backup now.
7.5.3 Checks
On the Wyse,
sudo ls -lhR /srv/ha-backupsshould show the backup you just created.Enable the daily delivery check on the Wyse:
sudo systemctl enable --now dell-wyse-ha-backup-check.timer
sudo systemctl start dell-wyse-ha-backup-check.service
Every morning at 07:00, it fails, and alerts, unless the share holds a backup newer than 26 hours. That also catches a dead Pi, a stopped HA, a broken share or a full disk, none of which anything on the Pi could report. When only the upload fails, HA also raises the repair “Automatic backup could not be uploaded to the configured locations” under Settings → System → Repairs.
See Home Assistant network storage and Home Assistant backups for more details.
7.6 Off-site mirror on a Hetzner Storage Box
dell-wyse-offsite copies two things that are encrypted before they leave the house: AIO’s Borg repository from HDD 2, and the HA backups.
It starts at 06:30 and first waits until AIO’s backup container and any Borg lock are gone.
Then it copies the repository in three passes: new data segments first, then the index files that reference them, and only then deletions.
So once the first run has finished, even an interrupted run leaves a usable repository on the Storage Box; at worst it holds some newer segments, which the restore in section 7.7 removes.
The job also fails if the Borg repository has not changed in 26 hours, which catches an AIO backup that never ran.
Storage Box. Order one in the Hetzner Console, sized for the Borg repository plus growth and snapshots: with about 860 GiB of Nextcloud data, the 1 TB box is too small. A smaller box can be enlarged later on its tab Rescale, without losing data or sub-accounts.
- Project: create a Console project of its own for it, for example
backup, and create no API tokens in it: a project’s read/write token can delete the box’s snapshots. - Access: unselect any SSH key and use Generate a password only. The key in the order form would authorize the main account; the Wyse’s key goes to its sub-account in step 4. Store the password in your password manager; the Wyse needs it only to copy from a snapshot (section 7.7, step 3).
- Additional settings: leave SMB, WebDAV, SSH and external reachability off for the main account, unless something else uses them.
- Project: create a Console project of its own for it, for example
Automatic snapshots. On the box’s tab Snapshots, choose Enable automatic snapshots: interval Daily, the highest Max. amount the box allows, and an execution time in the afternoon, after the nightly copy, for example
13:00UTC. The time is UTC and does not follow daylight saving time, so 13:00 is 14:00 in winter and 15:00 in summer in Germany. These snapshots protect the mirror when the Wyse is compromised or a sync copies a damaged repository: they are managed only in the Hetzner Console, never through the SSH key that the Wyse holds. They count against the box’s space, and when the maximum is reached, the oldest is deleted.Sub-account. Give the Wyse a sub-account of its own, so that its key reaches nothing else on the box, such as other machines’ backups added later. On the box’s tab Subaccounts, choose Create subaccount:
- Base directory:
dell-wyse. It becomes the sub-account’s home directory, and the main account sees the copies under this name. - Additional settings: turn on Allow SSH and External reachability. Leave Allow SMB and Allow WebDAV off, and do not make it Read-Only.
- Password: generate one and store it in your password manager; step 4 asks for it once.
- Description: for example
Dell Wyse Thin Client 5070.
The list then shows the sub-account’s user, such as
u123456-sub1; its login isu123456-sub1@u123456.your-storagebox.de.- Base directory:
SSH key. Create a key that only root on the Wyse uses, and authorize it for the sub-account. Port 23 is the Storage Box’s SSH service with rsync; port 22 speaks only SFTP and SCP.
-smakesssh-copy-idwork with the box’s restricted shell, and it asks for the sub-account’s password once. Compare the host key fingerprint with the one Hetzner publishes. Replaceu123456-sub1andu123456with your sub-account’s user and your box’s main user:sudo install -d -m 0700 /root/.ssh sudo ssh-keygen -t ed25519 -N '' -C dell-wyse-offsite -f /root/.ssh/dell-wyse-offsite sudo ssh-copy-id -p 23 -s -i /root/.ssh/dell-wyse-offsite.pub u123456-sub1@u123456.your-storagebox.de sudo ssh -p 23 -i /root/.ssh/dell-wyse-offsite u123456-sub1@u123456.your-storagebox.de ls -al # total 10 # drwxr-xr-x 3 u123456-sub1 1113 3 Nov 17 12:40 . # dr-x--x--x 7 root root 11 Nov 17 12:36 .. # drwx------ 2 u123456-sub1 1113 3 Nov 17 12:40 .sshls -allists the sub-account’s home directory, still empty apart from whatssh-copy-idput there. That directory is all the key can reach.Settings. In
/etc/dell-wyse/host.env, setOFFSITE_TARGETto the sub-account’s login,u123456-sub1@u123456.your-storagebox.de. For the first upload, also setOFFSITE_BWLIMIT, for example to2500KiB/s, about 20 Mbit/s, so that Nextcloud stays usable from outside while it runs:sudoedit /etc/dell-wyse/host.envFirst upload, after the first AIO backup (section 9.3.3 or 9.4.4). Until AIO has created the repository, the job has nothing to copy, so start it only then, by hand. The first run copies the whole repository, which takes days at a typical home upload rate. AIO’s nightly backups during that time only make the job copy again what changed. An interrupted run fails with an alert, and the next run continues where rsync stopped. The timer does not start a second run while the first is still busy, and the daily snapshots taken meanwhile hold a partial mirror until they rotate out. To change
OFFSITE_BWLIMITduring the upload, edit it, then stop and start the job: the cut-off segment resumes, and the stop sends one failure alert. Once the checkdell-wyse-offsiteappears green in healthchecks.io, set its period and grace time (section 7.1) and clearOFFSITE_BWLIMIT; the next run reads it. Start the job, enable the timer and follow the journal:sudo systemctl start --no-block dell-wyse-offsite.service sudo systemctl enable --now dell-wyse-offsite.timer sudo journalctl -fu dell-wyse-offsite.service # keep open, it prints "Finished..." or "Failed", or close it with "CTRL+C"
Monitoring a running upload.
The journal stays silent after “Starting…”, because rsync prints nothing; the job is still working as long as systemctl status says activating (start).
pgrep -a rsync shows the pass: --include=/data/*** is the bulk of the data segments, --exclude=/data the index files, --delete with /mnt/backup/borg/ the cleanup, and /srv/ha-backups/ the HA copy at the very end.
No rsync process means that the job is waiting for AIO’s backup or a Borg lock to finish, for up to four hours.
systemctl status dell-wyse-offsite.service --no-pager
pgrep -a rsync
sudo du -sh /mnt/backup/borg      # the total to copy
sudo bash -c '. /etc/dell-wyse/host.env; ssh -p "${OFFSITE_PORT:-23}" -i /root/.ssh/dell-wyse-offsite "$OFFSITE_TARGET" du -sh borg'   # arrived so far
The copies are in borg/ and ha-backups/ in the sub-account’s home directory, which the main account sees as dell-wyse/.
Storage Box access and Storage Box snapshots provide further information.
To restore from it, follow section 7.7: it stops the mirror job, copies the repository next to its final place on HDD 2 and prepares it before AIO opens it.
7.7 Restore from the Storage Box
Follow these steps when HDD 2 is lost or its repository is damaged.
If HDD 2 itself is lost, first prepare its replacement: set HDD2 in the first block of section 7.2.1 and run only the HDD 2 block there, never the whole subsection.
Then mount it as the note Replacing a single HDD at the start of section 7.2.3 says.
Stop the mirror job, including a run in progress, so that no nightly run copies a half-restored repository over the good copy:
sudo systemctl disable --now dell-wyse-offsite.timer
sudo systemctl stop dell-wyse-offsite.service
Copy the repository into
/mnt/backup/borg.restore, next to its final place, so that the job finds no repository until it is complete. Copy the HA backups back into/srv/ha-backupsas well: the job refuses to mirror an empty share, but a half-filled one would replace the Storage Box’s HA backups. Both rsync commands read everything through your home download, which takes hours:sudo bash -c '. /etc/dell-wyse/host.env; ssh="ssh -p ${OFFSITE_PORT:-23} -i /root/.ssh/dell-wyse-offsite" rsync -a --info=progress2 -e "$ssh" "$OFFSITE_TARGET:borg/" /mnt/backup/borg.restore/ && rsync -a -e "$ssh" "$OFFSITE_TARGET:ha-backups/" /srv/ha-backups/' # Give the HA backups back to the share's account, so HA can rotate them sudo chown -R hass-backup:hass-backup /srv/ha-backupsPrepare the copy before AIO or Borg opens it. A run that broke off in its first pass can leave newer segments with gaps, because rsync copies in name order, and Borg would replay them when it opens the repository. The script below removes them. It also moves Borg’s nonce counter far past anything those segments, or a newer copy elsewhere, may have used: Borg encrypts with AES-CTR, and a counter must never be used twice. If the script refuses, the lines after it do not run. If a damaged repository is still in
/mnt/backup/borg, move it aside first, for example to/mnt/backup/borg.damaged:mv -Tdoes not replace it.borg checkasks for the Borg password:sudo apt install --no-install-recommends borgbackup -y sudo bash -euo pipefail <<'EOF' && cd /mnt/backup/borg.restore [ -f config ] && [ -s nonce ] || { echo "Not a complete Borg repository" >&2; exit 1; } # The newest non-empty index names the last transaction the copy holds completely n=$(find . -maxdepth 1 -type f -size +0 -name 'index.*' -printf '%f\n' | sed -n 's/^index\.\([0-9][0-9]*\)$/\1/p' | sort -n | tail -n 1) [ -n "$n" ] || { echo "No index: this copy never finished a run" >&2; exit 1; } [ -n "$(find data -mindepth 2 -maxdepth 2 -type f -size +0 -name "$n")" ] || { echo "Segment $n, which index.$n needs, is missing: run step 2 again if it broke off, else copy from a snapshot (section 7.7, step 3)" >&2; exit 1; } # Drop the segments newer than that transaction, then move the nonce counter ahead by 2^40 find data -mindepth 2 -maxdepth 2 -type f -printf '%f %p\n' | awk -v n="$n" '$1 ~ /^[0-9]+$/ && $1 + 0 > n + 0 { print $2 }' | xargs -r rm -v -- printf '%016x' $(( 0x$(cat nonce) + (1 << 40) )) > nonce EOF sudo mv -T /mnt/backup/borg.restore /mnt/backup/borg && sudo borg check /mnt/backup/borgIf the script reports a missing segment, check that the copy in step 2 finished without an error; if it broke off, run step 2 again: rsync skips what it already copied. If the copy was complete, the mirror itself is damaged, and only one of the box’s snapshots from before the damage helps. Only the main account can read them: in the Hetzner Console, turn on its SSH Support and External Reachability under Actions → Change settings, and Display snapshot directory on the box’s tab Snapshots. On that tab, also choose Disable automatic snapshots, so that no new snapshot pushes out the one you need; then check that the existing snapshots are still listed. Never choose Restore snapshot there: it rolls back the whole box and deletes all newer snapshots. SSH can take a few minutes to start working, and every
sshandrsyncbelow asks for the main account’s password. Replaceu123456with your box’s main user andSNAPSHOTwith a snapshot from before the damage. Its newestindex.Nneeds the segmentdata/D/N, whereDisNdivided by 1000, rounded down; if that segment is missing there too, try an older snapshot:sudo ssh -p 23 u123456@u123456.your-storagebox.de ls .zfs/snapshot # one directory per snapshot sudo ssh -p 23 u123456@u123456.your-storagebox.de ls .zfs/snapshot/SNAPSHOT/dell-wyse/borg # its newest index.N sudo ssh -p 23 u123456@u123456.your-storagebox.de ls -l .zfs/snapshot/SNAPSHOT/dell-wyse/borg/data/D/N sudo rm -rf /mnt/backup/borg.restore # the damaged copy sudo rsync -a --info=progress2 -e 'ssh -p 23' \ u123456@u123456.your-storagebox.de:.zfs/snapshot/SNAPSHOT/dell-wyse/borg/ /mnt/backup/borg.restore/Then run this step’s commands again; the HA backups from step 2 stay as they are. Afterwards, turn the main account’s SSH Support, External Reachability and Display snapshot directory off again, and enable automatic snapshots again as in section 7.6, step 2.
Use the repository. If Nextcloud still runs on the Wyse, because only HDD 2 was lost, restore nothing: AIO keeps
/mnt/backupas its backup location and continues in the copied repository. In AIO’s backup section, click Create backup and wait until it succeeds, then enable the off-site timer again:sudo systemctl enable --now dell-wyse-offsite.timer. If that backup fails because Borg’s cache or security directory is newer than the repository, the Storage Box held an older state than the lost disk. Then remove AIO’s Borg cache, as AIO’s own backup reset does, withsudo docker rm nextcloud-aio-borgbackupandsudo docker volume rm nextcloud_aio_backup_cache, and create the backup again; step 3 has already moved the nonce counter ahead, so this is safe. If Nextcloud is lost too, restore through Path B (section 9.4) with this repository on HDD 2. Enable the timer again in section 9.4.4, step 7, once AIO has written its first new backup and/srv/ha-backupsholds HA’s backups:sudo systemctl enable --now dell-wyse-offsite.timer. To bring Home Assistant itself back, restore one of the HA backups through HA’s own backup page or during HA’s onboarding, with the emergency kit.
8 Prepare Tailscale for the host and the sidecar
Two tailnet nodes run on the Wyse.
The host itself joins as dell-wyse, tagged tag:server, for SSH from anywhere.
Nextcloud has a node of its own: the sidecar container nextcloud-tailscale registers as nextcloud, tagged tag:nextcloud, and publishes Nextcloud through Serve and Funnel.
That keeps Nextcloud’s name and certificate independent of the host.
Tagged nodes have no key expiry.
Sidecars on my other machines keep tag:container; separate tags let the policy treat each group differently and limit what the Wyse’s OAuth secret can do.
See Tailscale in Docker for more on the sidecar pattern, and its parameters for the environment variables that the compose file uses.
8.1 Tailscale admin console
DNS: note the DNS name of your tailnet, which this guide writes as
tailnet-name.ts.net, and confirm that MagicDNS and HTTPS Certificates are enabled.Access controls: add or check the following tags, and the Funnel attribute for
tag:nextcloud, next to any existing entries (liketag:container) that other machines depend on. The host needs no Funnel:"tagOwners": { "tag:container": ["autogroup:admin"], "tag:nextcloud": ["autogroup:admin"], "tag:server": ["autogroup:admin"], }, "nodeAttrs": [ {"target": ["tag:container"], "attr": ["funnel"]}, {"target": ["tag:nextcloud"], "attr": ["funnel"]}, ],Optional, narrower access: with the default allow-all policy, every tailnet device can reach the Nextcloud AIO interface on port 8080 and SSH on the host. The AIO passphrase and your SSH keys still protect them. To narrow it down, allow 443 for every member, and 8080 and SSH only for admins:
"grants": [
  {
    "src": ["autogroup:member"],
    "dst": ["tag:nextcloud"],
    "ip":  ["tcp:443"],
  },
  {
    "src": ["autogroup:admin"],
    "dst": ["tag:nextcloud"],
    "ip":  ["tcp:8080"],
  },
  {"src": ["autogroup:admin"], "dst": ["tag:server"], "ip": ["tcp:22"]},
],
These grants narrow anything only once the broad default rule, which allows
*to reach*:*, is replaced by explicit rules for the rest of the tailnet. The separate tags are what make that practical: a rule such as{"src": ["*"], "dst": ["tag:container"], "ip": ["*"]}keeps other Tailscale sidecars exactly as open as before, so only Nextcloud and the host change. Add rules for whatever your own devices need from each other, and use the policy editor’s preview before saving. Funnel traffic is not governed by these grants; it arrives through Tailscale’s ingress relays and is allowed byAllowFunnelin the serve configuration.OAuth client (under Settings → Trust credentials): create a separate client for the Wyse, with only the
auth_keysscope with write access (Keys → Auth Keys) and only the tagtag:nextcloud. A leaked Wyse secret can then add nothing buttag:nextcloudnodes, and other secrets stay as they are. The sidecar must advertise exactly that tag, which the compose file does. If device approval is enabled, append&preauthorized=truetoTS_AUTHKEYin the compose file; see OAuth clients for more details. Store the secret in your password manager.
8.2 On the Wyse
On Ubuntu, install Tailscale from its signed repository, as with Docker in section 6, and log the host in with its tag.
tailscale up prints a login link: open it on the Mac, signed in as an admin, and approve the device if device approval is on.
dell-wyse node.
If the admin console still lists a node called dell-wyse, for example from an earlier installation, delete it first; otherwise the host becomes dell-wyse-1.codename=$(. /etc/os-release && echo "$VERSION_CODENAME")
sudo curl -fsSL "https://pkgs.tailscale.com/stable/ubuntu/$codename.noarmor.gpg" -o /etc/apt/keyrings/tailscale.gpg
sudo chmod a+r /etc/apt/keyrings/tailscale.gpg
sudo tee /etc/apt/sources.list.d/tailscale.sources >/dev/null <<EOF
Types: deb
URIs: https://pkgs.tailscale.com/stable/ubuntu
Suites: $codename
Components: main
Signed-By: /etc/apt/keyrings/tailscale.gpg
EOF
sudo apt update
sudo apt install --no-install-recommends tailscale -y
sudo tailscale up --hostname=dell-wyse --advertise-tags=tag:server --accept-dns=false
sudo tailscale set --auto-update
tailscale status
# 100.96.85.107 dell-wyse dell-wyse.tailnet-name.ts.net linux -
--advertise-tags=tag:servermakes the host a tagged node: no key expiry, and not tied to your account.--accept-dns=falsekeeps the host on the FRITZ!Box’s DNS, so name resolution on the host and in its containers stays as it is, including AIO’s domain check in section 9.3.2. With Serve instead of Funnel, the host needs--accept-dns=trueinstead; see the note Serve instead of Funnel in section 9.2. That setting persists, but running thetailscale upline above again as printed turns it off, so with Serve leave--accept-dns=falseout of it.--auto-updatelets Tailscale keep its own package current; Ubuntu’s automatic updates do not cover its repository.- SSH stays with OpenSSH, your keys and the hardening from section 5; Tailscale SSH is not enabled.
tailscale0 before UFW sees it.
It also opens its own WireGuard port, 41641/udp, which stays silent without a valid key.
So the tailnet policy, with the grants from section 8.1, step 3, is the firewall for the tailnet.Test it from the Mac, at home or away; the host key’s fingerprint is the one from section 5.5:
ssh wmutschl@dell-wyse
ssh wmutschl@100.96.85.107
9 Nextcloud
9.1 Plan the Tailscale node name for Nextcloud
The sidecar’s MagicDNS name is the domain that Nextcloud AIO is set up with, and it also names the certificate that Tailscale issues.
If a node with the same name already exists in the admin console, even offline, Tailscale gives the new node a suffixed name such as nextcloud-1.
The suffix stays when the other node is renamed later.
So free the name before the new sidecar first starts, or fix it afterwards with Edit machine name; see Machine names.
| Situation | TAILSCALE_HOSTNAME in .env |
|---|---|
| Path A, new name | Any name that no node in the admin console uses, for example nextcloud |
| Path A, replacing another instance | nextcloud, after the other node has been renamed (section 9.4.3) |
| Path B, restore | Exactly the domain inside the backup, nextcloud, after the handover in section 9.4.3 |
9.2 Configure the deployment on the Wyse
The repository was cloned to ~/scripts in section 5.3.
On the Wyse, bring it up to date and create .env from the template:
cd ~/scripts/Dell-Wyse-Thin-Client-5070
git pull
cp dell-wyse.env .env
chmod 600 .env
nano .env
Fill in TAILSCALE_OAUTH_KEY and set TAILSCALE_HOSTNAME according to the table in section 9.1.
TAILSCALE_SERVE_CONFIG=nextcloud-funnel.json keeps this guide’s Funnel setup; the note below covers the tailnet-only alternative.
Keep NEXTCLOUD_DATADIR=/srv/nextcloud/data: it must be set before AIO starts for the first time, and must never change afterwards.
Git ignores .env.
Review the two files that the stack uses (press q to quit less):
less docker-compose.yml
less ../Tailscale/nextcloud-funnel.json
What they configure:
- Sidecar: containerboot logs in with the OAuth secret only if the node has no saved state (
TS_AUTH_ONCE=true); otherwise it would mint a new single-use key on every restart. It advertisestag:nextcloud, disables the upload of client logs (TS_NO_LOGS_NO_SUPPORT=true) and runs in userspace mode without extra privileges. It loads the file named inTAILSCALE_SERVE_CONFIG,nextcloud-funnel.jsonby default, with${TS_CERT_DOMAIN}replaced by the node’s own name, and re-applies it whenever it changes. - Serve/Funnel: 443 proxies to
http://nextcloud-aio-apache:11000and is public through Funnel (AllowFunneltrue). 8080 proxies to the mastercontainer and is tailnet-only (AllowFunnelfalse). Funnel only ever serves the ports 443, 8443 and 10000, so 8080 cannot become public by accident. - Mastercontainer: joins the pre-created
nextcloud-aionetwork, as upstream’s compose file allows for custom network settings. AIO puts its own containers on the same network, which is how the sidecar resolvesnextcloud-aio-apache. AIO also trusts that network’s subnet as a proxy by itself.APACHE_IP_BINDING="@INTERNAL"publishes no Apache port on the host; AIO’s own Caddy community container uses the same value. The mastercontainer’s only published port, 8080 for the break-glass tunnel (section 9.6), is bound to127.0.0.1. The network itself setscom.docker.network.bridge.host_binding_ipv4=127.0.0.1, so any port that AIO publishes without an explicit address lands on loopback as well; that only concerns Talk (section 5.6). During setup, AIO’s temporary domaincheck container carries thenextcloud-aio-apachealias, so the sidecar reaches it too. - Limits:
NEXTCLOUD_MEMORY_LIMIT=2048MandNEXTCLOUD_UPLOAD_LIMIT=32G. AIO accepts only these formats: megabytes for memory, gigabytes for uploads. - Project name:
dell-wyse. Keep it different fromnextcloud-aio, the compose project label that AIO puts on its own containers, so that those never look like orphans of this project.
Serve instead of Funnel.
To keep Nextcloud reachable only from devices in your tailnet, set TAILSCALE_SERVE_CONFIG=nextcloud-serve.json in .env; that file is nextcloud-funnel.json without AllowFunnel.
On a stack that already runs, do the policy and DNS steps below first and run the check below while Funnel is still on; then sudo docker compose up -d nextcloud-tailscale applies the file, and the sidecar keeps its tailnet identity.
Also drop the funnel attribute for tag:nextcloud from the policy (section 8.1, step 2): Serve does not need it, and without it Tailscale cannot publish Nextcloud even if the sidecar is started with nextcloud-funnel.json again.
AIO’s own containers still have to reach Nextcloud under its name, which only Funnel puts into public DNS, so let the host resolve tailnet names: sudo tailscale set --accept-dns=true, instead of --accept-dns=false from section 8.2.
Docker forwards the containers’ lookups to the host’s systemd-resolved, which then sends tailnet names to Tailscale’s resolver and everything else to the FRITZ!Box.
resolvectl status tailscale0 then lists 100.100.100.100 under DNS Servers, your tailnet’s name and reverse zones under DNS Domain, and -DefaultRoute.
If DNS Domain shows ~. instead, Override DNS servers is on in the admin console’s DNS settings, and the host’s other lookups go to the tailnet’s global nameservers instead of the FRITZ!Box.
The containers then reach the sidecar through the host’s own tailnet connection, as tag:server, so with the grants from section 8.1, step 3, also allow tag:server to reach tag:nextcloud on tcp:443.
While the host’s Tailscale restarts, for example during its automatic update, these calls fail for those seconds.
If the containers cannot resolve and reach the name this way, Euro-Office cannot open or save documents, desktop clients lose Client Push and poll instead, Administration settings → Overview warns that the server cannot connect to itself, and Talk’s signaling server and Whiteboard’s recordings fail.
Once AIO’s containers run, each of them must reach Nextcloud through the sidecar’s tailnet address, 100.x, with 200; leave out nextcloud-aio-eurooffice without Euro-Office:
for c in nextcloud-aio-nextcloud nextcloud-aio-eurooffice nextcloud-aio-mastercontainer; do
  sudo docker exec "$c" curl -sS -m 10 -o /dev/null -w "$c %{remote_ip} %{http_code}\n" https://nextcloud.tailnet-name.ts.net/status.php
done
serve status lists both URLs as (tailnet only); skip the Funnel checks in sections 9.3.1, 9.3.2 and 9.4.3.
With the host resolving the name, AIO’s domain check in section 9.3.2 should pass; if it does not, skip it as described there.
Every device that uses Nextcloud, including those of other users, needs the Tailscale app, connected and with Tailscale DNS on.
Under the default allow-all policy, other users’ devices can then reach every device in your tailnet, including the AIO interface and SSH on the host, so narrow the policy as in section 8.1, step 3.
Public share links and federated sharing reach no one outside the tailnet.
Nextcloud treats tailnet addresses as local and refuses its own requests to them unless the feature opts in, which Euro-Office, Client Push and the setup checks do; AIO removes the global allow_local_remote_servers at every start.
Subscribing to a public calendar link of the same instance needs sudo docker exec --user www-data nextcloud-aio-nextcloud php occ config:app:set dav webcalAllowLocalAccess --value=yes; other refusals show up as violates local access rules in the log.
Nextcloud blocks this by default for security reasons: the setting lets every user’s calendar subscriptions reach any LAN, tailnet or container address, so set it only if such a subscription is needed.
When an instance switches from Funnel, public resolvers can list Funnel’s addresses for hours, but the route behind them closes at once.
Validate the compose file and pre-pull the images.
cd ~/scripts/Dell-Wyse-Thin-Client-5070
sudo docker compose config --quiet
sudo docker compose pull
Always run compose from ~/scripts/Dell-Wyse-Thin-Client-5070, so that .env and ../Tailscale resolve.
Never run docker compose down for this project: it would try to remove the nextcloud-aio network while AIO’s own containers are still attached; use stop and up -d instead.
The socket mount’s :ro option does not make Docker API operations read-only, so treat access to the AIO interface as administrator access to the host; see upstream’s compose file and AIO behind a reverse proxy.
9.3 Path A: fresh Nextcloud install
9.3.1 Path A: Start the stack and check the node name
Confirm that the name in .env is free in the admin console.
If you are reusing nextcloud, first stop the other instance and rename its node as described in sections 9.4.1 and 9.4.3.
Then, on the Wyse:
cd ~/scripts/Dell-Wyse-Thin-Client-5070
sudo docker compose up -d

sudo docker compose logs --tail 50 nextcloud-tailscale

sudo docker exec nextcloud-tailscale tailscale status --json | python3 -c \
  'import json,sys; print(json.load(sys.stdin)["Self"]["DNSName"].rstrip("."))'

sudo docker exec nextcloud-tailscale tailscale serve status
# # Funnel on:
# #     - https://nextcloud.tailnet-name.ts.net
# https://nextcloud.tailnet-name.ts.net (Funnel on)
# |-- / proxy http://nextcloud-aio-apache:11000
# https://nextcloud.tailnet-name.ts.net:8080 (tailnet only)
# |-- / proxy https+insecure://nextcloud-aio-mastercontainer:8080
Proceed only if the printed name is exactly the one you planned, for example nextcloud.tailnet-name.ts.net.
If it carries a suffix, rename the node in the admin console, then restart the sidecar so that its serve configuration picks up the new name:
sudo docker compose restart nextcloud-tailscale
serve status should list the name with Funnel on for 443 and tailnet-only for 8080.
A backend error on 443 is expected until AIO’s Apache container runs.
“Funnel on” alone is not proof.
Without the funnel node attribute from section 8.1, the serve file is still accepted and reported as Funnel on, but Tailscale creates no public DNS record.
Check the attribute on the Wyse; it should print True:
sudo docker exec nextcloud-tailscale tailscale status --json | python3 -c \
  'import json,sys; s=json.load(sys.stdin)["Self"]; print(any("funnel" in c for c in list(s.get("Capabilities") or []) + list(s.get("CapMap") or {})))'
# True
Then check the public DNS from another machine, such as the Mac, through a public resolver rather than MagicDNS:
dig @1.1.1.1 +short nextcloud.tailnet-name.ts.net
# 185.40.234.37
# 185.40.234.172
# 185.40.234.210
These should be addresses outside 100.x, but the record can take up to ten minutes to appear.
9.3.2 Path A: Set up Nextcloud AIO
On a tailnet device, open
https://nextcloud.tailnet-name.ts.net:8080, with your planned name. The certificate is Tailscale’s, so there is no browser warning.Copy the generated AIO passphrase into your password manager and log in. The AIO passphrase, the Nextcloud administrator password and the Borg backup password are three different credentials.
Enter the domain without a port:
nextcloud.tailnet-name.ts.net. AIO validates it from inside the mastercontainer. With Funnel, the host does not use MagicDNS (--accept-dns=false, section 8.2), so the name resolves to Funnel’s public addresses, and Funnel carries the check back through the sidecar to AIO’s domaincheck container. On my Wyse, the validation failed nonetheless, so expect to skip it, but only after confirming the public route yourself:From a phone with Tailscale disabled,
https://nextcloud.tailnet-name.ts.netanswers with a valid certificate.On the Wyse,
sudo docker exec nextcloud-tailscale tailscale serve statusshows Funnel on for 443.From the Mac, the name resolves to a public address that serves Tailscale’s certificate for it:
name=nextcloud.tailnet-name.ts.net
ip=$(dig @1.1.1.1 +short "$name" | grep -v ':' | head -1); echo "$ip"
curl -sv --resolve "$name:443:$ip" "https://$name" -o /dev/null 2>&1 \
  | grep -E 'subject:|issuer:|SSL certificate verify|< HTTP'
#   185.40.234.37
#   *  subject: CN=nextcloud.tailnet-name.ts.net
#   *  issuer: C=US; O=Let's Encrypt; CN=YE1
#   *  SSL certificate verify ok.
#   < HTTP/2 302
Only then reload the interface as
https://nextcloud.tailnet-name.ts.net:8080/containers?skip_domain_validationand enter the domain again. That skips the check without changing the compose file; recent AIO versions keep the flag for the rest of the browser session and show it in a yellow bar. Without the check, AIO does not catch a typo, so compare the domain character by character; see AIO domain validation. With Serve instead of Funnel, the check goes through the host’s MagicDNS (note Serve instead of Funnel in section 9.2), and the Funnel checks above do not apply.Choose the optional containers. For a fresh, lightly used instance on the J4105, start with Talk, ClamAV, Whiteboard and the community containers disabled unless you need them. Keep one office service if occasional editing in the browser is useful, and enable Imaginary only for previews you actually want. The CPU, rather than the RAM, is the main reason to avoid unnecessary indexing and preview work. Optional containers can be added later through AIO.
Set the time zone to
Europe/Berlinand click Download and start containers. The first start downloads several images and initializes PostgreSQL and Nextcloud; allow 10–20 minutes on this CPU.When AIO reports all containers as running, it shows the initial administrator name and password. Store them, then open
https://nextcloud.tailnet-name.ts.netor click the blue button Open your Nextcloud.
9.3.3 Path A: First steps in the new Nextcloud
- Enable multi-factor authentication (TOTP) for the administrator and store its recovery codes.
- Create the user accounts. Use them for daily sync, not the administrator account.
- Set up the AIO backup to
/mnt/backupand create the first backup before putting data in; then enable daily backups at 03:00 UTC (section 10.1). Then start the off-site mirror (section 7.6, step 6). - Run the post-installation tasks in section 9.5.
9.4 Path B: reinstall from an AIO backup
This restores the complete previous instance: accounts, shares, public links, calendars, contacts, file versions, app data and the AIO configuration, including its domain and optional containers.
Use it to move a previous instance to the Wyse, and to rebuild the Wyse later.
Section 7.2 has already prepared the HDDs by what was on them: disks with this guide’s backups were reused in section 7.2.2, and only disks with nothing you still needed were erased in section 7.2.1.
Do not run section 7.2.1 again here.
If the Borg repository itself were damaged, the daily copies on HDD 1 still contain every user’s files under @nextcloud.<timestamp>/data.
You need:
- Section 7 done: both HDDs mounted, BTRBK timers running, alerts working, the HA share in place.
- A complete, recent AIO Borg repository, the whole
borgdirectory rather than a single archive, and its Borg password. - A way for the Wyse to read it: HDD 2 from section 7.2 (see 9.4.2), or a remote Borg repository reachable over SSH. If HDD 2 is lost too, copy the off-site mirror back from the Storage Box first (section 7.7).
- Sections 8, 9.1 and 9.2 done:
~/scripts/Dell-Wyse-Thin-Client-5070/.envfilled in withTAILSCALE_HOSTNAME=nextcloud, images pulled, stack not started.
9.4.1 Path B: Freeze the source (moving from the previous instance)
In the previous instance’s AIO interface, update AIO and its containers, confirm that Nextcloud works, and create an initial backup.
In the maintenance window, let all users finish syncing, then pause their clients. Stop the containers through the AIO interface and create the final backup. Confirm that AIO reports it as successful.
Keep the old endpoint from coming back. On the previous machine, stop the sidecar and the mastercontainer by their container names, which works regardless of where its compose file lives:
docker update --restart=no nextcloud-tailscale nextcloud-aio-mastercontainer
docker stop nextcloud-tailscale nextcloud-aio-mastercontainer
docker ps --filter name=nextcloud
The last command must list no running Nextcloud container. Keep the previous instance’s Docker volumes and its data directory (
/Volumes/Docker/nextcloudon my Mac) untouched: they are your rollback. Do not rundocker compose down -vor any prune there.
9.4.2 Path B: Make the Borg repository readable on the Wyse
The repository goes onto HDD 2 (/mnt/backup, section 7.2) and stays there as the Wyse’s ongoing AIO backup repository; later backups continue in it with deduplication.
Do not restore from a repository on the Vi560 itself: the repository and the restored data together would leave too little free space, and it would not be independent storage.
/mnt/backup since section 7.2.3.
Check that with findmnt /mnt/backup and sudo ls /mnt/backup/borg, then continue with section 9.4.3.To transfer the Mac’s repository, wait until the final backup has finished and nothing else runs on the repository.
Check that HDD 2 has room for it with df -h /mnt/backup.
Then, on the Wyse, give your account a target directory:
sudo install -d -m 0700 -o "$USER" -g "$USER" /mnt/backup/borg
On the Mac, copy the repository, then compare checksums.
Replace the source with the old machine’s actual AIO backup directory, which contains borg, and adjust the login:
/usr/bin/rsync -rt --partial --progress --stats -e ssh \
  '/PATH/TO/MAC/AIO-BACKUP/borg/' 'wmutschl@192.168.178.55:/mnt/backup/borg/'
/usr/bin/rsync -rtc --dry-run --itemize-changes --stats -e ssh \
  '/PATH/TO/MAC/AIO-BACKUP/borg/' 'wmutschl@192.168.178.55:/mnt/backup/borg/'
The checksum pass must report no transferred files.
Where AIO asks for the backup location, enter the parent directory, /mnt/backup.
For a remote Borg repository, have its SSH URL ready instead.
See AIO-to-AIO migration and remote Borg backups for details.
9.4.3 Path B: Hand over the Tailscale name
In the Tailscale admin console, open the old node that holds
nextcloudand rename it to an unused name. For the sidecar of the previous instance, I usenextcloud-mac-retiredand keep the node for a rollback. When rebuilding the Wyse, the old node’s state is gone with the reinstallation, so delete it instead. Do not rename the tailnet or touch unrelated nodes.On the Wyse, start the stack and check the name, exactly as in Path A:
cd ~/scripts/Dell-Wyse-Thin-Client-5070
sudo docker compose up -d
sudo docker exec nextcloud-tailscale tailscale status --json | python3 -c \
  'import json,sys; print(json.load(sys.stdin)["Self"]["DNSName"].rstrip("."))'
sudo docker exec nextcloud-tailscale tailscale serve status
Proceed only if the output is
nextcloud.tailnet-name.ts.net. Otherwise, fix the name in the admin console and restart the sidecar. Run the two Funnel checks from Path A (section 9.3.1) as well: the restore skips the domain validation, so nothing else would notice a missing public route.
Reusing the name does not preserve the old node’s Tailscale IP address or identity; adjust any node-specific policy entries.
The Wyse’s node carries tag:nextcloud, and the retired node keeps tag:container.
Never copy the retired sidecar’s state volume to the Wyse while the retired node still exists.
9.4.4 Path B: Restore in AIO
- On a tailnet device, open
https://nextcloud.tailnet-name.ts.net:8080. Save the new AIO passphrase and log in. The restore keeps this new passphrase; the old one is not restored. - Choose Restore former AIO instance from backup. Do not set up a new instance first.
- Enter the backup location and the old Borg password, then submit.
For a local repository, enter the parent of
borg, starting with/and without a trailing slash:/mnt/backup. For a remote repository, leave the local field empty and enterssh://user@host:port/path/to/repo. Then click Test path and encryption password. Once the test succeeds, AIO lists the archives. With a remote repository, the first test fails and AIO shows an SSH public key: authorize it on the remote side, submit the location again and repeat the test. - Optionally, run Check backup integrity (
borg check --verify-data); it reads the whole repository and takes long on a USB disk. Select the final archive and click Restore selected backup. Exclude previews from restore saves time and space; AIO then rescans the preview folder by itself the next time the Nextcloud container starts, and Nextcloud regenerates previews on demand. For about 860 GiB, allow several hours. If the source used community containers, AIO asks for the same backup to be restored a second time. - When the restore finishes, start the containers from the AIO interface you are using, so that AIO records this URL as its administration address.
- Check the restored instance: every user’s files, shares and public links, calendars and contacts, file versions, and office editing if enabled. Download sample files and compare their hashes with the source.
- Check the backup settings in AIO.
The restored instance keeps the location you just restored from; make sure that is
/mnt/backupon HDD 2 (or your remote repository). Set daily backups at 03:00 UTC (section 10.1) and create a new backup. Then start the off-site mirror (section 7.6, step 6), or, once/srv/ha-backupsholds HA’s backups again, enable its timer again if you disabled it for the restore (section 7.7). - Keep the source’s optional containers for this first test. Simplify only after acceptance, through AIO.
9.4.5 Path B: Reopen
Unpause one desktop client first and watch it reconcile, then the phones and the other users. The restored instance has the same URL, file IDs and sync state, so the clients continue rather than starting a new sync relationship. Keep the old instance’s data, volumes and retired Tailscale node until the restored instance has passed the checks in section 9.4.4, step 6.
9.5 After either path: Nextcloud configuration
Review Administration settings → Overview and fix what it reports. Then go through these settings:
- Administrator’s email address: set up personal details and an email address for the administrator account under Personal settings → Personal info, so that the test mail below has a recipient.
- Security: under Administration settings → Security, consider enforcing two-factor authentication for all users. Under Administration settings → Sharing, decide whether public links require a password and an expiration date. Leave Nextcloud’s built-in brute-force protection enabled.
Email server. Nextcloud sends password resets, share notifications and activity mails through an SMTP server.
I use an otherwise inactive Gmail account, authenticated with an app password rather than the Google account’s password.
Google offers app passwords only for accounts with 2-Step Verification; create one at myaccount.google.com/apppasswords.
Nextcloud keeps it in plain text in config.php, and so in every Borg backup, but an app password can be revoked on its own without touching the Google account.
Then open Administration settings → Basic settings → Email server and enter:
| Field | Value |
|---|---|
| Send mode | SMTP |
| Encryption | SSL/TLS |
| From address | yourname @ gmail.com |
| Server address | smtp.gmail.com : 465 |
| Authentication | enabled |
| Credentials | yourname@gmail.com and the 16-character app password, without spaces |
Click Save, then Send email to test the settings.
STARTTLS on port 587 works as well (Encryption None/STARTTLS).
Maintenance tasks. Next, run these two commands on the Wyse:
sudo docker exec --user www-data nextcloud-aio-nextcloud php occ maintenance:repair --include-expensive
sudo docker exec --user www-data nextcloud-aio-nextcloud php occ config:system:set default_phone_region --value="DE"
The first command removes the warning about the MIME type migration and can run for a while; the second sets the phone region used for numbers without a country code.
Previews on the J4105. Generating previews is the main CPU load of a photo-heavy instance. When AIO installs Nextcloud, it already caps the largest preview at 2048 instead of Nextcloud’s default of 4096 pixels and lowers the JPEG quality of previews from 80 to 60. The first three commands below make sure that a restored or migrated instance has the same values. The last two let Nextcloud generate two new previews at a time, and four in total, instead of four and eight on the J4105’s four cores, so that the Wyse stays responsive while it works through a large import. Existing previews keep their size:
sudo docker exec --user www-data nextcloud-aio-nextcloud php occ config:system:set preview_max_x --value=2048 --type=integer
sudo docker exec --user www-data nextcloud-aio-nextcloud php occ config:system:set preview_max_y --value=2048 --type=integer
sudo docker exec --user www-data nextcloud-aio-nextcloud php occ config:app:set preview jpeg_quality --value=60
sudo docker exec --user www-data nextcloud-aio-nextcloud php occ config:system:set preview_concurrency_new --value=2 --type=integer
sudo docker exec --user www-data nextcloud-aio-nextcloud php occ config:system:set preview_concurrency_all --value=4 --type=integer
Previews can always be generated again, so keep them out of AIO’s Borg backup: that shrinks the repository, the nightly backup and the off-site upload.
AIO skips the preview folder when it holds a .noaiobackup file.
Never put that file into the data directory itself: there it excludes every user’s files.
The snapshots on HDD 1 still contain the previews.
After restoring such a backup, run sudo docker exec --user www-data nextcloud-aio-nextcloud php occ files:scan-app-data preview once, unless you ticked Exclude previews from restore, which makes AIO run that scan by itself (section 9.4.4).
sudo docker exec --user www-data nextcloud-aio-nextcloud sh -c \
  'd="/mnt/ncdata/appdata_$(php occ config:system:get instanceid)/preview"; mkdir -p "$d" && touch "$d/.noaiobackup" && ls -l "$d/.noaiobackup"'
See preview settings and AIO backup exclusions for more details.
Optional: video transcoding with Memories, only if you use the Memories app for photos and videos.
The J4105’s integrated GPU can transcode video through VA-API; Intel’s iHD driver supports Gemini Lake.
AIO hands the GPU on to its containers when the mastercontainer itself gets /dev/dri.
The older NEXTCLOUD_ENABLE_DRI_DEVICE variable is deprecated.
Under AIO, Memories transcodes in its own community container.
Enable that container as its README describes, uncomment the devices lines in docker-compose.yml, and recreate the mastercontainer.
Then stop and start the containers in the AIO interface and turn on VA-API in Memories’ admin settings:
ls -l /dev/dri
cd ~/scripts/Dell-Wyse-Thin-Client-5070
sudo docker compose up -d nextcloud-aio
See AIO hardware acceleration, the Memories community container and Memories hardware transcoding for further details.
Full-text search: when the full-text search container is enabled, AIO handles the three fulltextsearch apps itself on every start of the Nextcloud container.
It installs and enables them, points them at its password-protected Elasticsearch, and runs the initial index once.
So instead of running occ commands for that by hand, use AIO’s switch to enable or disable it.
New files are indexed by Nextcloud’s background jobs.
See AIO’s Nextcloud entrypoint for details.
Optional: clearing the Nextcloud log, if needed.
The log lives in the nextcloud_aio_nextcloud volume, not in the data directory, and AIO’s backup excludes it:
sudo docker exec --user www-data nextcloud-aio-nextcloud truncate -s 0 /var/www/html/data/nextcloud.log
9.6 Later logins to the AIO interface
Direct passphrase login is blocked while Nextcloud’s Apache container runs.
Open Administration settings → Overview as administrator from a tailnet device and use the AIO button at the top.
It unblocks the passphrase login for your browser for a few minutes and leads to the address you used when starting the containers.
Tailscale Serve keeps the original Host header, so that is the tailnet URL on port 8080.
Its certificate is valid, so the HSTS header that Nextcloud sends for the domain does not get in the way.
If the sidecar is stopped or broken, use the break-glass tunnel instead.
Stop Apache (sudo docker stop nextcloud-aio-apache) and open the tunnel from the Mac:
ssh -N -o ExitOnForwardFailure=yes \
  -L 127.0.0.1:18080:127.0.0.1:8080 wmutschl@192.168.178.55
Then open https://127.0.0.1:18080; that endpoint uses AIO’s self-signed certificate, so the browser warning is expected.
Away from home, use wmutschl@dell-wyse instead of the LAN address: the host’s own tailnet connection does not depend on the sidecar.
Update AIO only through its interface, after a successful backup. Do not put these containers under Watchtower or a similar updater; see how to update the containers.
10 Backups and ongoing care
10.1 AIO Borg backup to HDD 2
AIO’s encrypted Borg backup covers the files and the database and configuration, and AIO stops the containers while it runs. That makes it the consistent copy for Path B. In AIO’s backup section:
- Path A: enter
/mnt/backupas the backup location. AIO shows the Borg password of the new repository; store it in your password manager. Then click Create backup, which creates the repository in/mnt/backup/borg. - Path B: the restore already set
/mnt/backup, with the repository copied from the Mac. - Both: enable daily backups at 03:00; the field appears only once the first backup exists. AIO reads that time as UTC, so the backup starts at 04:00 in winter and 05:00 in summer in Germany, after the 01:30 BTRBK send and before the 06:30 off-site mirror.
- Both: run Check backup integrity quarterly, as part of the restore drills below.
AIO’s daily backup can also update the containers automatically afterwards, which is reasonable once a few manual updates went smoothly. External Storage app mounts need separate coverage; see AIO backup coverage.
10.2 Host configuration and recovery material
AIO’s backup does not contain the host.
The host lives in @root and so reaches HDD 1 every night, and almost all of its configuration is in the scripts repository, under Dell-Wyse-Thin-Client-5070/ and Tailscale/.
Keep the rest outside the Wyse as well:
- In your password manager: the OAuth secret from
~/scripts/Dell-Wyse-Thin-Client-5070/.env; the values in/etc/dell-wyse/host.env(healthchecks.io ping key, Storage Box sub-account); the LUKS passphrases and header backups of the SSD and HDD 1; the AIO passphrase and the Borg password; the Samba password and the Storage Box passwords of the main account and the sub-account; the Home Assistant emergency kit. - Recreated by the guide rather than kept in Git, because they contain this installation’s disk UUIDs, interface names or keys:
/etc/fstab,/etc/crypttab,/etc/netplan, the UFW rules, and dracut-sshd with its host key andauthorized_keys(sections 3.3, 4, 5 and 7.2). - In Tailscale: your policy file and node names. Keep a copy of the policy file too.
The sidecar’s state volume needs no backup. A rebuilt sidecar registers again with the OAuth secret.
After a change on the host, compare it with the repository to see what has not made it there yet.
The loop compares every file under etc/ and usr/ with its counterpart on the host.
No output means that they all match; a file missing on the host shows up as No such file or directory.
The files at the folder’s top level are not compared: the compose file and .env are used where they are, and the templates’ filled-in copies exist only on the host:
cd ~/scripts/Dell-Wyse-Thin-Client-5070
find etc usr -type f | while read -r f; do diff -u "/$f" "$f"; done
10.3 Snapshots around risky changes
The hourly snapshots are crash-consistent. Before an Ubuntu release upgrade or a large AIO change, stop the Nextcloud containers through AIO, then take a consistent set by hand:
sudo systemctl start dell-wyse-btrbk-snapshot.service
sudo btrbk list snapshots
Restore Nextcloud through Path B rather than by rolling back @docker on its own.
@containerd is not snapshotted, and @docker and @nextcloud belong together; see BTRFS snapshot behavior.
10.4 Regular checks
healthchecks.io reports failed and missed jobs by itself (section 7.1). Trim runs weekly (section 5.1), the scrub monthly (section 7.4). Look at these now and then anyway, especially after an import and after updates:
for fs in / /mnt/btrbk /mnt/backup; do sudo btrfs filesystem usage -T "$fs"; sudo btrfs device stats "$fs"; done
sudo btrbk list latest
systemctl list-timers 'dell-wyse-*'
sudo journalctl -u dell-wyse-btrbk-send -u dell-wyse-scrub -u dell-wyse-offsite --since '40 days ago'
sudo ls -lh /srv/ha-backups
sudo docker system df
cd ~/scripts/Dell-Wyse-Thin-Client-5070
find etc usr -type f | while read -r f; do diff -u "/$f" "$f"; done
systemctl --failed
10.5 Restore drills
A backup counts only once a restore from it has worked. Put these into your calendar:
| When | Drill | Passing result |
|---|---|---|
| Quarterly | Copy one file back from the newest hourly snapshot and the same file from HDD 1 (section 7.3, Getting something back) | Both match the original (sha256sum) |
| Quarterly | Check backup integrity in AIO’s backup section | AIO reports the repository as intact |
| Quarterly | Extract one file from the newest Borg archive on the host, without AIO (below) | The file opens, so the Borg password in your password manager works |
| Quarterly | In HA, Settings → System → Backups | The newest backup is on dell_wyse, and the emergency kit is in your password manager |
| Yearly | Restore an HA backup from /srv/ha-backups onto a spare SD card or into a VM, through Restore from backup in HA’s onboarding, with the emergency kit | HA starts with your configuration |
| Yearly | Compare the Storage Box mirror with HDD 2 right after a nightly run (below), and look at the Storage Box’s snapshot list in the Hetzner Console | No differences; the snapshots are there |
| Yearly | Test HDD 1’s LUKS passphrase from your password manager, and check that the initrd still has your SSH key (below) | The passphrase is accepted; your key is listed |
| Yearly | Go through the recovery material listed above | Every password and file is there and works |
One file from Borg, without AIO. Run this on the Wyse outside the nightly jobs, which hold the repository from AIO’s backup at 03:00 UTC until the off-site copy finishes.
Borg asks for AIO’s Borg password.
AIO uses Borg 1.4, so check that borg --version on the host shows a 1.x version too.
Archive names end in -nextcloud-aio, and the paths inside an archive are best found by listing:
sudo apt install --no-install-recommends borgbackup -y
sudo borg list /mnt/backup/borg
sudo borg list /mnt/backup/borg::ARCHIVE | grep '/USER_ID/files/' | head
cd "$(mktemp -d)"
sudo borg extract /mnt/backup/borg::ARCHIVE 'PATH/AS/LISTED/ABOVE'
HDD 1’s passphrase and the SSH unlock. The SSD’s passphrase gets tested at every boot.
HDD 1’s is never typed, because its keyfile opens it, so cryptsetup asks for it here.
Use the path of your HDD 1 from section 7.2.
The last command prints the keys that the initrd accepts:
sudo cryptsetup open --test-passphrase /dev/disk/by-id/usb-WD_Elements_2621_57583632443334335444584A-0:0-part1
sudo lsinitrd -f root/.ssh/authorized_keys /boot/initrd.img-"$(uname -r)"
Storage Box comparison. Empty output means that the mirror matches HDD 2 byte for byte. The check reads the whole repository on both sides, which takes hours but transfers almost nothing:
sudo bash -c '. /etc/dell-wyse/host.env; rsync -rc --delete --dry-run --itemize-changes --exclude="/lock.*" \
  -e "ssh -p ${OFFSITE_PORT:-23} -i /root/.ssh/dell-wyse-offsite" /mnt/backup/borg/ "$OFFSITE_TARGET:borg/"'
10.6 Updates
Ubuntu: security updates, including ESM, install automatically. Livepatch covers urgent kernel fixes until the next reboot; still reboot in a maintenance window when
/var/run/reboot-requiredappears.Boot chain: every reboot waits for the SSH unlock, which runs from other machines at home or over Tailscale (section 5.7). After changing your SSH keys, update
/etc/dracut-sshd/authorized_keysand rebuild the initrd (section 5.7). Check dracut-sshd’s releases once a year. To update, rungit fetch --tagsin~/dracut-sshdand review what changed (git diff 0.7.1 NEW_TAG -- 46sshd), then check out the new tag, replace/usr/lib/dracut/modules.d/46sshdwith its46sshdand rebuild the initrd.Docker packages: a reviewed
sudo apt full-upgradein a maintenance window, as they restart the daemon and with it all containers.AIO: only through its interface, after a backup, or through its automatic update after the daily backup.
Tailscale on the host: updates itself (
tailscale set --auto-update, section 8.2).Tailscale sidecar: AIO does not manage its image. Update it occasionally:
cd ~/scripts/Dell-Wyse-Thin-Client-5070
sudo docker compose pull nextcloud-tailscale
sudo docker compose up -d nextcloud-tailscale
Scripts repository: after
git pullin~/scripts, runsudo docker compose up -din~/scripts/Dell-Wyse-Thin-Client-5070, so that the containers pick up changes to the compose file or.env. A restart or reboot keeps a container’s old settings, and a sidecar whose serve file was renamed then starts without any serve configuration.
healthchecks.io watches the backups and SMART, but open its dashboard now and then. Avoid automatic volume-pruning scripts. If the logs grow excessively, a journald drop-in can set a compact journal limit, while retaining enough history to investigate failures.